Seeing Aphra's "Project Disney" layouts really inspired me to take
another look at some leftover Disney World photos I've had in a box
since 2009. I've scrapped lots of Disney pages from that trip, but I
still have a lot of "extra" photos that are too special for me to just
throw out. It might be the look on someone's face in the picture....a
little detail that captures a special moment...you know what I'm talking
about. I printed almost every single Disney photo because each one,
even though it may be similar to another photo, helps capture something
special that I didn't want to forget. I'm sentimental like that. ;)
Anyway,
scrapping every single Disney photo that I took is probably not 100%
possible, but using the "Project Disney" style of layout certainly helps
get those photos into the album and the stories told! So....here's
what I did:
Using
my leftovers from the June kit, I cut papers down to the sizes I needed
to fill each pocket, added a few small embellishments or Disney
stickers that I've had forever, and added photos. Once my journaling was
written, I had 8 Disney photos scrapped and documented! It was SO easy
and SO fast! And, it's the perfect way to kill some TSR kits.
Pull
out a couple of divided page protectors, some leftover TSR kits, and
see what you can create. Every photo scrapped is a memory documented
forever. That's really what it's all about, right? :)
- Jenny
Showing posts with label June Kit. Show all posts
Monday, June 17, 2013
Wednesday, June 12, 2013
Tips & Tricks: WRMK For The Record
I learned a few things while putting this recipe card layout together, so I thought I'd share!
(Wait, have you seen our recipe cards? You can access cutting instructions and photo sizes used - getting more pages done doesn't get any easier than that!)
The first thing I learned is that 12x12" paper doesn't fit in my printer. I know, right???? LOL I'm so used to doing 8.5x11" pages that printing my journaling is just one of those things I don't think about. I loved the WRMK just as is, so I didn't want to cut it up just to make it easier to work with. Except... I *could* cut it up if I was careful!
The other thing I learned is that sometimes things happen that you *can't* control. GASP! I know, right???? My pleated cardstock strip is an example of that.
I intended to just sew one nice straight line of stitches through the center of the strip. Well, I got it, sort of, but my machine was making this horrible noise and it was eating thread like crazy. And I was a little annoyed. I got a bunch of beautiful variegated silky thread for Christmas and it was just whizzing off the spool! I turned over the paper and discovered that the tension was really messed up and made this amazing loopy texture. Hmmmm... that would look really cool on TOP of my page... So I turned the page over, crossed my fingers, and sewed near my first sewn line.
And it worked! And I have no idea how to do this again on purpose. But I'm glad I ran with it - this ended up being one of my favorite pages of all-time.
Oh, and the photos? I don't have Instagram (maybe I'm one of the last people on the planet?) so I downloaded a free app named Pixlr-o-matic onto my desktop. Tons of fun filters and effects! And you can turn your rectangular photos square, too!
Hope you are inspired to try something new - or to turn a stumbling block into a jumping off point. You may just love what happens next. *big love*
- Theresa/Savi
(Wait, have you seen our recipe cards? You can access cutting instructions and photo sizes used - getting more pages done doesn't get any easier than that!)
The first thing I learned is that 12x12" paper doesn't fit in my printer. I know, right???? LOL I'm so used to doing 8.5x11" pages that printing my journaling is just one of those things I don't think about. I loved the WRMK just as is, so I didn't want to cut it up just to make it easier to work with. Except... I *could* cut it up if I was careful!
| I journaled and printed onto some plain printer paper. Next step is to tape the good paper on top - I use a lightbox, but a window works really well, too! |
| I sent the good paper (taped onto the printer paper) back through the printer and taped it all back together. You can see the pencil lines really helped me line things up! |
| Back in place. You can't tell, especially once it gets put into a page protector. |
I intended to just sew one nice straight line of stitches through the center of the strip. Well, I got it, sort of, but my machine was making this horrible noise and it was eating thread like crazy. And I was a little annoyed. I got a bunch of beautiful variegated silky thread for Christmas and it was just whizzing off the spool! I turned over the paper and discovered that the tension was really messed up and made this amazing loopy texture. Hmmmm... that would look really cool on TOP of my page... So I turned the page over, crossed my fingers, and sewed near my first sewn line.
And it worked! And I have no idea how to do this again on purpose. But I'm glad I ran with it - this ended up being one of my favorite pages of all-time.
Oh, and the photos? I don't have Instagram (maybe I'm one of the last people on the planet?) so I downloaded a free app named Pixlr-o-matic onto my desktop. Tons of fun filters and effects! And you can turn your rectangular photos square, too!
Hope you are inspired to try something new - or to turn a stumbling block into a jumping off point. You may just love what happens next. *big love*
- Theresa/Savi
Wednesday, June 5, 2013
June Sketch Challenge... and the May Sketch Winner!
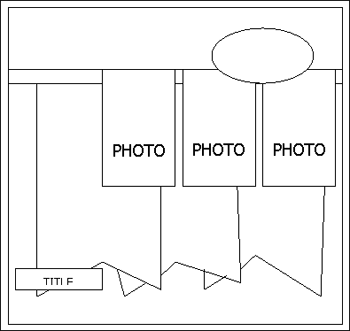
Did you get a chance to play along with us on National Scrapbooking Day? Yes? No? Hey, no worries - we're bringing back one of the inspiration sketches we used that day as our sketch this month. Yeah, we loved it so much we wanted another shot at it. *big smiles*
![]() |
| June ScrapRoom Sketch by Tammy Harp |
![]() |
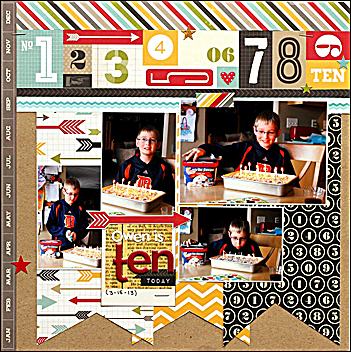
| "Owen is Ten Today" by Brenda Carpenter |
![]() |
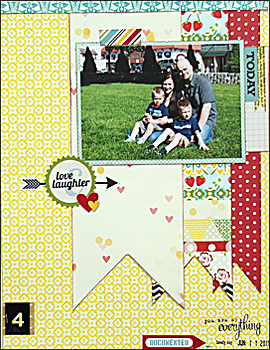
| "Love & Laughter" by Melanie Call |
![]() |
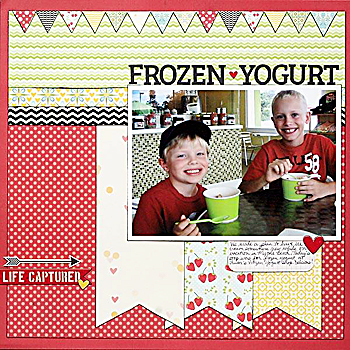
| "Frozen Yogurt" by Jennifer Moore |
| "Golf" by Theresa Sovacool |
And it's easy to win!
Just ask Cathy van de Bruinhorst - she's our May ScrapRoom Sketch winner. I absolutely love these precious photos of this grandpa and grandson. And I can just hear the conversation they're having! *big love*
![]() |
| "Tell Me More Grandpa" by Cathy van de Bruinhorst |
- Theresa/Savi
Monday, June 3, 2013
June Kits Have Arrived at the ScrapRoom!
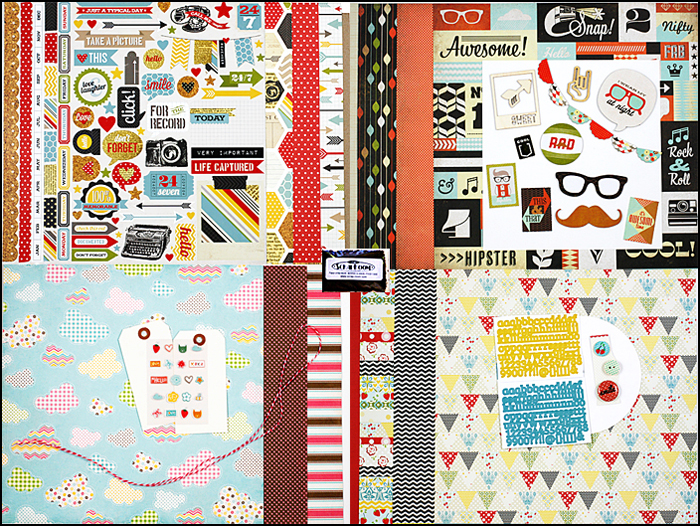
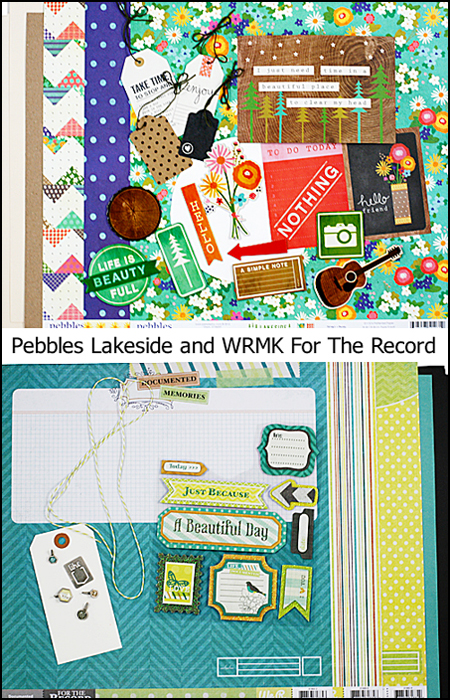
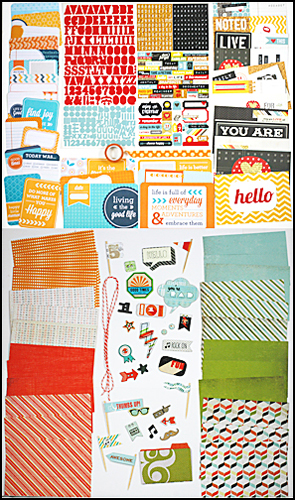
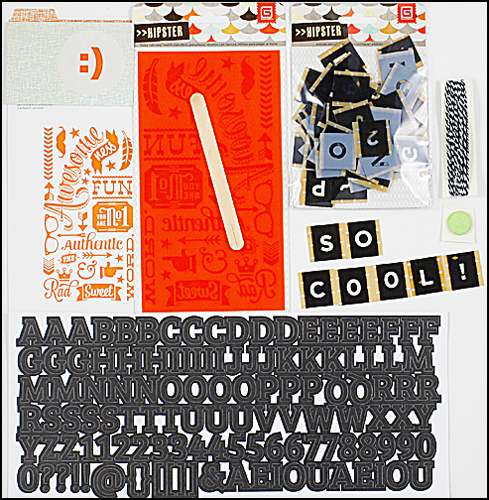
We are pleased to introduce this month's kits: truly everything you need to get more pages done! Whether you are fond of layouts, mini albums, cards, or Project Life (or something like Project Life), you'll find that June is a good month to have a kit from TSR coming your way. As always, The ScrapRoom kits are designed to give you a taste of all the newest offerings conveniently matched up with coordinating cardstock and other goodies. Just grab our kits and you'll have pages in no time... and if you need a little inspiration, don't forget to peek in at our gallery, too!
![]() |
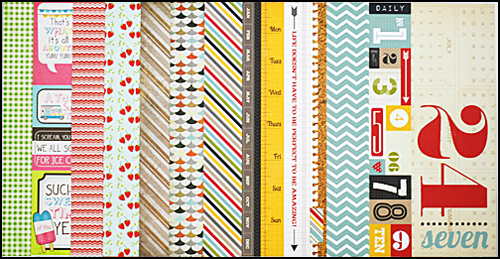
| FOTM Kit: Simple Stories 24/7, BasicGrey Hipster, Carta Bella Cool Summer, Lily Bee Sweet Shoppe |
![]() |
| Doubleshot Kit: Pebbles Lakeside & WRMK For the Record |
![]() |
| Project Life Kit |
![]() |
| Embellishment Kit |
![]() |
| Patterned Paper Kit |
![]() |
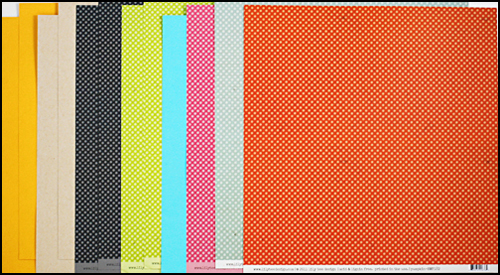
| Cardstock Kit |
![]() |
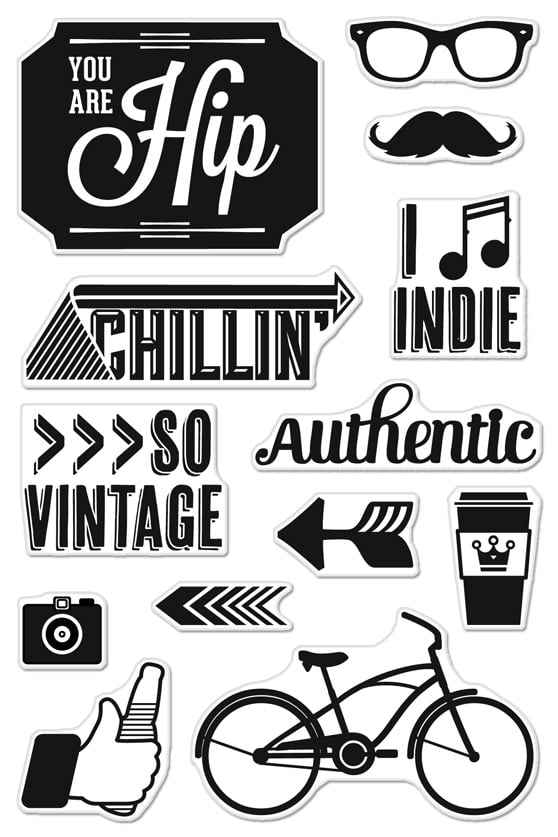
| Stamp Kit |
Thursday, May 30, 2013
Sneak Peek #6: Carta Bella Cool Summer (FOTM)
![]() |
| "Good Stuff" by Jennifer Moore |
"Full of iconic summer images and rich patterns, this whimsical collection is a perfect way to document your summer." -- Carta Bella blog
Wednesday, May 29, 2013
Sneak Peek #5: WRMK For the Record (Doubleshot)
| "Dream" by Gina Barone |
"The process of documenting life just got a whole lot easier – not to mention stylish – with the For the Record collection. This collection includes a myriad of journaling prompts to help with the process of documenting life’s most important moments and all the little ones in between. Look for note cards, built in journaling lines, date boxes, classic grids, old school ledger paper, numbered lists, and more. For the Record combines a clean, professional feel while adding a touch of surprise as seen in the citrus color pallet of green, orange, and yellow, with hints of aqua and charcoal gray." -- WRMK website
Tuesday, May 28, 2013
Sneak Peek #4: Lily Bee Sweet Shoppe (FOTM)
![]() |
| "Disney: China" by Aphra Bolyer |
"Light hearted, vintage patterns in oh so sweet colors. Perfect for birthdays, sweet girls and boys or those everyday sweet life moments. We've combined just the right amount of chevron, floral, damask and polka dot patterns. You'll feel like a kid in a candy store with our new Sweet Shoppe Collection." -- Lily Bee blog
Monday, May 27, 2013
Sneak Peek #3: Simple Stories 24/7 (FOTM)
![]() |
| "Cousins Sleep Over" by Jennifer Moore |
"The 24/7 collection is for any everyday moment!" -- Simple Stories blog
Sunday, May 26, 2013
Sneak Peek #2: Pebbles Lakeside (Doubleshot)
![]() |
| "NSD Life" by Theresa Sovacool |
"Spend a day at the lake and sing around the campfire at night with Lakeside, a new collection from Pebbles. Icons of canoes, wildflowers and camping gear in forest green, salmon pink and brilliant blue are grounded by organic brown and chalkboard black. Complimented by gingham, polka dots, woodgrain and florals, Lakeside is ideal for remembering sweet, summer days spent outdoors." -- Pebbles blog
Saturday, May 25, 2013
Sneak Peek #1: BasicGrey Hipster (FOTM)
![]() |
| "Awesome" by Melanie Call |
"With childhood behind you, it’s time to step out into that great big world and find your own unique identity. You want to stand out as true individual—as a Hipster. And this is just the collection to show your true swagger. Hipster will pack your creative wardrobe with rad retro prints, groovy geometrics, flower-power florals, and muted earth tones." -- BasicGrey blog
Thursday, June 23, 2011
An Extra Sketch and a Reminder!!
Hi, Sarah here with an extra sketch to get your imagination going! Clouds, butterflies and flowers seem to be in right now so I used those elements as inspiration for this sketch.
For my layout I used the super cute Pebbles from the June Flavors of the Month kit. I just love that flowered paper! It immediately reminded me of this picture of my little girl that I have been saving for almost a year now. It matches her outfit perfectly :)
Everything on my layout above is from the June Flavors of the Month Kit and Double Shot Kit except the white letters (May embellishment kit) and the flowers with the jewels in the center and twine (from my stash).
And don't forget about our Sketch Challenge we having going on at the moment. You can check out the deets HERE.
I hope you have enjoyed this sketch! I can't wait to see what you do with it!

I hope you have enjoyed this sketch! I can't wait to see what you do with it!

Tuesday, June 21, 2011
A Cool Tip from Aphra!
Hi there ScrapRoom friends! Aphra here today with a quick tip to help you "Get more pages done." When I have multiple photos to include on a layout, I print out a collage. Here's two of my ScrapRoom layouts using collages.
A Day of Egg Hunting
For this layout, I used the Glitz papers included in the May ScrapRoom Flavors of the Month kit and a 5" x 7" collage print. I love that I was able to fit six pictures on the layout without it feeling too cramped. I like a little white space.
Perfect Day
And here I incorporated seven pictures in the form of an 8" x 10" collage print in a layout using SEI's Corinne from the June Flavors of the Month kit. And still the layout has plenty of white space and room for embellishments.
Both of these collages were done at WalGreen's One Hour Photo. I chose a white background, but there are other lots of other color choices and layout options. You can pick whichever photo you like best as your focus. And best of all, it's inexpensive. The 8"x10" was $3.99 and the 5"x7" was $1.99. You can check it out HERE.
There are several other places that offer collage prints. You can order them from WalMart and have them shipped to your home with prices starting as low as $0.09. I have also used Snapfish and Winkflash, which both ship to your home. It just depends on who happens to have the best deal at the time and how quickly I want the print.
Friday, June 17, 2011
Father's Day is Upon Us
Good morning and did you notice that it is Friday? Well, it's Father's Day weekend, and I don't know about you, but I have plans to take TONS of pics of my hubby, my father-in-law, and my daddy. This month I asked some of the DT girls to create a few projects in lieu of Father's Day, and of course they rocked it! Take a look...


See? Totally rocked it, right?
Well, I sure hope you have a great Father's Day, and please share any of your Father's Day projects here...we would love to see them!!
Daddy's Boy by Jenny

Happy Father's Day Dad! Card by Melanie

Always a Boy at Heart by Kim
See? Totally rocked it, right?Well, I sure hope you have a great Father's Day, and please share any of your Father's Day projects here...we would love to see them!!
Thursday, June 16, 2011
DT Inspiration with Sarah!
Hello, hello! I hope everyone is having a great start to their summer!
Today I am here to talk to you about stitching and doodling. They are my go to techniques to finish off a layout. You know the layouts that you look at and think "this just needs something"? When that happens to me I always add some faux stitching and doodling.
On my spring layout below that I created with the June Double Shot kit I used both a black and white pens for my doodling and stitching. I have found it best to keep lots of different brands of brown, black and white pens handy. All pens look different on different colors and types of paper. Before doodling I will test the pens on the back of the paper I am going to write on (or on a scrap if I have one) to see which pen works the best.
Let's talk about stitching first! I love it! I love how it looks on a layout, but can't always use my sewing machine or have time to hand stitch. When that happens I use faux stitching. All the stitching on this layout is fake (except for the criss crosses in the corners), but I bet you couldn't tell that! Most people mistake my faux stitching for real stitching. The trick is very simple. Use a paper piercer! I first pierce holes along the edges where I want to add my faux stitching and then go back with a pen and connect them. It is so fast and easy and tricks just about everyone!
Today I am here to talk to you about stitching and doodling. They are my go to techniques to finish off a layout. You know the layouts that you look at and think "this just needs something"? When that happens to me I always add some faux stitching and doodling.
On my spring layout below that I created with the June Double Shot kit I used both a black and white pens for my doodling and stitching. I have found it best to keep lots of different brands of brown, black and white pens handy. All pens look different on different colors and types of paper. Before doodling I will test the pens on the back of the paper I am going to write on (or on a scrap if I have one) to see which pen works the best.
Let's talk about stitching first! I love it! I love how it looks on a layout, but can't always use my sewing machine or have time to hand stitch. When that happens I use faux stitching. All the stitching on this layout is fake (except for the criss crosses in the corners), but I bet you couldn't tell that! Most people mistake my faux stitching for real stitching. The trick is very simple. Use a paper piercer! I first pierce holes along the edges where I want to add my faux stitching and then go back with a pen and connect them. It is so fast and easy and tricks just about everyone!
You can see below where I have pierced the holes for my faux stitching and a close up of my doodling. On this layout I did all my faux stitching and doodling free hand, but if I want straight lines I will use a ruler. For the stitching use a ruler and pencil to draw the straight lines then erase the lines and connect the holes. I doodle on pretty much every layout. It's never fancy, usually just a few lines around the edges of my paper. On this layout I doodled around the edges of my photo collage to bring all the photos together.
Friday, June 10, 2011
We {Heart} Banners!!
It's Friday...It's Friday...Whoot! Whoot!! I'm here today to share with you what is trending in our gallery...BANNERS!! From month to month here in The ScrapRoom Gallery we are using banners to embellish our layouts and cards. They are perfect for a title or just to fill in that bare space in the corner! Take a look at how our talented design team used banners this month...


Don't you just love their takes on using banners? Well, I sure hope they have inspired you to use a few soon! Have a great weekend!
Picture Perfect by Jenny

My Boys by Melanie

A Happy Family by Kim

Happy & Carefree by Aphra

A Warm Hello Card by Sarah

Happy With You by Melanie
Don't you just love their takes on using banners? Well, I sure hope they have inspired you to use a few soon! Have a great weekend!
Thursday, June 9, 2011
Design Team Inspiration with Aphra!!
Hello my scrappy friends! Glad you've stopped by today because I have a quick and easy tutorial for you. We'll be making the bow on this card from the June gallery.
Are you ready? Ok. Here we go.
Step One: Cut a 1" x 5" strip of double-sided patterned paper. Notch both ends of the strip and cut in half.
Step Two: Add notched strips to your project.
Step Three: Cut a 1" x 8" strip of paper and create a loop.
Step Four: Place a glue dot on the insdie and press together to create a figure eight.
Step Five: Use a scrap of 1" x 2" paper from one of previous strips and add it to the center of figure eight with reverse pattern showing. Wrap around the back and adhere.
Are you ready? Ok. Here we go.
Step One: Cut a 1" x 5" strip of double-sided patterned paper. Notch both ends of the strip and cut in half.
Step Two: Add notched strips to your project.
Step Three: Cut a 1" x 8" strip of paper and create a loop.
Step Four: Place a glue dot on the insdie and press together to create a figure eight.
Step Five: Use a scrap of 1" x 2" paper from one of previous strips and add it to the center of figure eight with reverse pattern showing. Wrap around the back and adhere.
Step Six: Attach to your project and embellish.
Hope you've enjoyed this easy tutorial. If you create a bow for your projects, please share it with us on our Facebook page. We'll stop by to ooohhh!!! and ahhhh!!! over it and leave you some love. Have a great day!
Subscribe to:
Posts (Atom)