ECHO PARK PAPER THE WILD LIFE


Monday, August 31, 2015
September Sneak Peek #6
Sunday, August 30, 2015
September Sneak Peek #5
SEW SWEET SUNSHINE SOUP

Featuring a line for our Doubleshot Kit today: Layout by Jillibean Soup designer, Nicole Nowosad, and featured on the Jillibean Soup Blog.
Everyone of us crafters can find a use for the creative and colorful designs! --- Jillibean Soup Blog
Saturday, August 29, 2015
September Sneak Peek #4
WE R MEMORY KEEPERS WILDFLOWER

Projected created by Samantha Taylor and shown on the WRMK Blog.
This romantic collection is perfect for late summer/early fall with its rich color palette, and includes beautiful botanical images with trendy watercolor textures and ombre effects. -- WRMK Blog
Friday, August 28, 2015
September Sneak Peek #3
BASIC GREY BARISTA

Order up a grande half white mocha, half cafe vanilla, easy on the ice, with whipped cream and a caramel drizzle, then get ready to create! Barista serves up a delicious combination of black,white and grey, combined with warm hues of rich cream, buttery yellow and sweet caramel. From wedding pages to thinking of you cards, and all themes in between, your Barista projects will be fat-free and filled with love. -- Basic Grey Blog
Thursday, August 27, 2015
September Sneak Peek #2
BASIC GREY B-SIDE

Layout by Basic Grey designer, Sarah Webb, and featured on the Basic Grey Blog.
B-Side is a nod to the backside of life, from a collection of old 45’s to side B of last year’s patterned paper. This collection has a relaxed and carefree vibe, filled with retro and contemporary patterns. -- Basic Grey Blog
Wednesday, August 26, 2015
September Sneak Peek #1
CRATE PAPER WONDER

Layout by Crate Paper designer, Jennifer Chapin, and featured on the Crate Paper Blog.
Tuesday, August 25, 2015
Guest Designer, Heather: Got Scraps

I LOVE going through the new papers and embellishments that come with a new kit. But after all the layouts and cards have been created there are still usually a few precious scraps, stickers or other embellishments left over. The papers and accents with August’s kits were so fun and colorful that I just hated to waste anything.
With
the latest craze of cut files there are ways to use up practically every bit of
your kit. I recently finally gave in and bought a Silhouette Portrait. I
created this fun cut file (inspired by heat waves) to use up the last of my
Sunshine October Afternoon kit. I love how it turned out.
Maybe
I’m the only one, but before I started playing around with my Silhouette I
wondered how to match the paper scraps to the spaces in the cut files easily. I
watched a you-tube video and had a “Well, Duh!” moment So I’ll share, even if
you already know.
Decide
which side of the cut file you’re going to use and which papers are going to be
showing. Then turn everything over. Trace roughly with a pencil through the
spaces onto the back of the papers. Then cut around each traced piece adding
about a quarter inch a margin (this will be your glue area). I usually use a
Martha Stewart glue pen since it’s such a small area - remember to add the glue
to the edge on the FRONT of the paper, then set the cut file on top and stick
down.
I
had some summery stickers and little sun ray paper left over so I added these to
my misted cardstock. I always try to use a little older product on my pages too
so I pulled out some older rubons and stickers and made a fun title. BTW, an
ice lolly is a popsicle in America!
AND
… you too can try this with your scraps. Click on the link below the picture to find the cut file to
downoad.

Monday, August 24, 2015
Daily Inspiration: Layout of the Day!


Saturday, August 22, 2015
Daily Inspiration: Layout of the Day!


Thursday, August 20, 2015
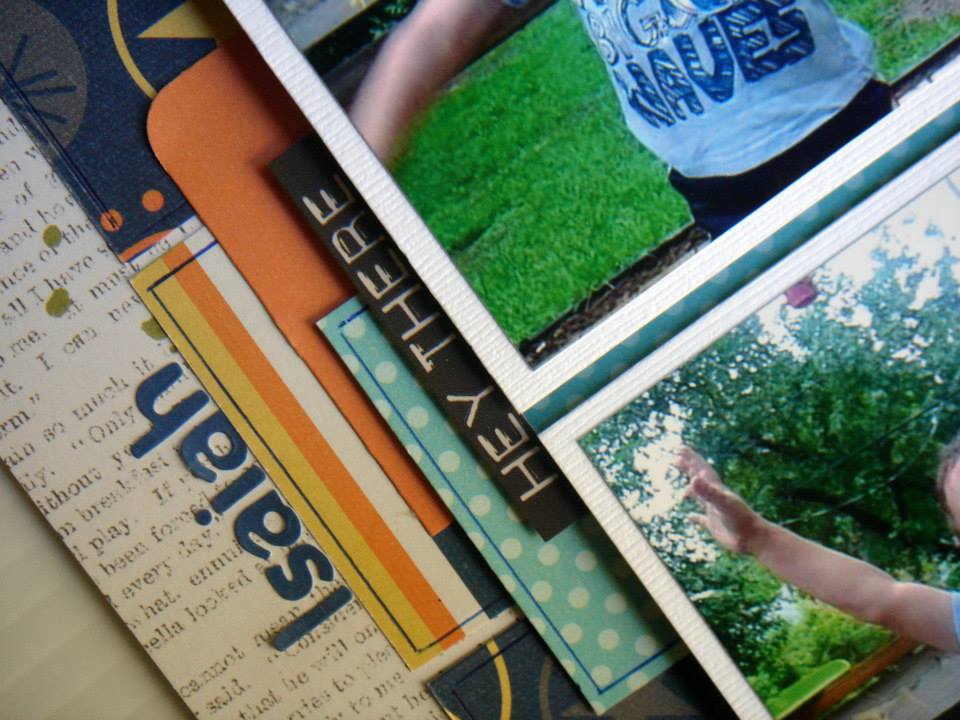
The Story Behind the Page: Heather

Every year when we visit my family in Ireland we walk down to Murlough Bay - a beautiful long stretch of sandy beach, with maybe two or three dog walkers enjoying the sea air. There are not too many swimming friendly days in Ireland - cool temperatures and even cooler water temperatures, although the kids usually make it in. Imagine our surprise when last year we discovered a new lifeguard station - closed of course - maybe they're expecting hordes of swimmers !! So when I saw all the lifeguard diecuts I knew I had to scrap this photo.
(Heather used the August Pagemaps sketch and FOTM Summertime kit with Embellishment Add-Ons)
Tuesday, August 18, 2015
Daily Inspiration: Layout of the Day!

Sunday, August 16, 2015
Daily Inspiration: Layout of the Day!

Today, we are inspiring you with a fun layout created by The ScrapRoom Designer, Rochelle Spears. She used the Crate Poolside line. I love the cute pictures and the movement with the waves cut in the papers. I really loved the paradoxical quality of this line. I found it to to be rustic with its' vintage vibe and full of glam at the same time. See how Rochelle's close-up shows fonts that you would associate with days gone by and gold touches that add a wonderful touch of flair.

Friday, August 14, 2015
Guest Designer, Heather Tips: More Is More
I’m
sure you’ve heard the expression “Less is More.” In scrapbooking, sometimes the
opposite can be true. I don’t mean just keep adding stuff to your page, although
I always have to resist that impulse. I think that sometimes a large group of
photos or embellishments can really add a “WOW” factor to a page. They become
the feature or tell the story. Let me show you a few examples

On
this page I added a large group of speech bubbles to emphasize Nathan’s thought
process at planning for college. His thoughts are taking over at this
point.


Thursday, August 13, 2015
The ScrapRoom Kits Make Cards Too!
Crate Paper Journey

Rochelle Spears

Brenda Ragsdale
October Afternoon Summertime and Crate Paper Poolside

Heather Robertson
Crate Paper Poolside

Heather Robertson

Rochelle Spears
Simple Stories So Rad

Heather Robertson

Heather Robertson
Simple Stories So Fancy

Rochelle Spears
Bella Blvd Star Student

Brenda Ragsdale

Rochelle Spears
Tuesday, August 11, 2015
Daily Inspiration: Layout of the Day!


Monday, August 10, 2015
Daily Inspiration: Layout of the Day!

Here's a "Sweet" layout from Rochelle Spears using October Afternoon Summertime. Love the depth and texture.

Saturday, August 8, 2015
Welcome Guest Designer, Heather Robertson!

How
long have you been scrapping and how did you get started?
I
have been scrapping for about 10 years . My friend was a Creative Memories
consultant and invited me to a party. I had 3 photos and nothing else.
Everyone else had bags full of “stuff” (now I understand why !!) I enjoyed the
idea but immediately knew that I had to break a few of the traditional
scrapbooking rules and do my own thing. I searched online and discovered a
wonderful digital site which totally inspired me. From there I branched out
into paper scrapping. Ever since I’ve been trying to find more rules to break
!!
Describe
your scrapbooking style
I
would say my primary style is graphic but messy - I love to make bold, eye
catching pages, usually with some sort of quirkiness - either in journaling,
for the title or with the photos. Lately, I seem to be adding lots of little
embellishments and stitching or misting. I love adding unexpected shapes or
design features - something that makes you look twice at the page and think
“that’s an interesting idea” . Although I really think that you can’t go wrong
with anything in scrapbooking I personally CANNOT have papers and embellies that
don’t “match” my photos. If a sticker saying doesn’t make sense to my page I
won’t use it. I get inspiration from ads on TV or in magazines or things around
me.
Describe
your scrapbooking process
Quite
often my pages look very straightforward but most have taken me many days to
complete and usually have lots of little details. I love challenges so usually I
start with a challenge. Then overnight I let the ideas percolate. My most
creative time is just before I fall asleep. I can’t start a page until I have
the photos I want to use. Then I spend a day thinking about what I want my page
to say. Then I pull out ALL of my papers until I find ones that suit. The same
with all my embellies. Then I play around with placement and leave it again,
returning to tweak the pieces as necessary. Finally I stick it all down.
Sometimes I journal and if so it’s usually an addition. If I’m creating my own
design I often will plan it out in Adobe PSE so I can play around with placement
and sizes.
Favorite
manufacturers and why
One
of my favorite things to do is mix manufacturers on a page - a typical page will
have 10-25 different manufacturers on it. I don’t really have a favorite
manufacturer - if a design or color appeals to me I will buy it. I may like
only a few pages in a collection and NEVER buy a whole collection. My recent
pages have embellishments from Heidi Swapp, Simple Stories, Fancy Pants,
Doodlebug, Bella Blvd, Webster’s Pages, Jillibean Soup. I also love, love, LOVE
woodgrain paper so I have quite a mixture of manufacturers.
Scrapbook
page designers that you admire or who influenced your style and how
I
really love browsing the galleries and picking up techniques or features from
everyone’s pages. I don’t really follow the “big” designers. In particular , I
love to check out digital pages which have some very cool design features. One
paper designer that springs to mind is Melissa Spinks. She really has a unique
style, her pages always have a ‘WOW” factor, they’re just different to the norm,
which is what I’m trying to achieve.
Other
than scrapbooking, what other things do you enjoy doing?
I
love working with my hands. My husband and I are renovating his mom’s house,
adding new flooring, painting etc. Next job will be refinishing our wood floor.
I love to play racquetball, bike and hike. While waiting to pick up my daughter
I enjoy reading mysteries or thrillers.


Will you, please, show us three of your favorite pages?
My favorite pages tend to change over time but here are three more recent ones that I love. As you can see they’re all very different.

This page brings back great memories. What I love about it are the bright pops of color against the white, the playfulness and lots of fun touches like the vellum sun, the multicolored title, misting, little fish

I really love the simplicity and graphic feel to this page and that Lauren’s cat ear is sticking out from the circular photo. I love the change in color to the title letters to match the color of cardstock and I love that it’s offset, yet balanced.

I love to cut photos in unique shapes. For this page I felt the chevrons added to a sense of movement as Kona races across the sand. It also brings back wonderful memories of Kona enjoyment of the beach in Homer.
You can see more of Heather's work on her blog, Unleashed.
Friday, August 7, 2015
Daily Inspiration: Layout of the Day!


Thursday, August 6, 2015
Daily Inspiration: Layout of the Day!

This layout using Crate Paper Journey by our guest designer, Heather Robertson, really caught my eye. In fact, it might lead to some tough decisions. You see, this fun woodgrain design is on the backside of the Tribal sheet. The Crate Paper Tribal sheet is the one with the multi-color zigzag lines in the August 2015 Favor of the Month kit. See the dilemma, two adorable patterns one sheet. I think Heather took the opportunity to use both and cut out a little piece of the base to use as the large arrow points on top. Here is a close-up from the page showing details of the perfectly stitched circle and fun tags cut from one of the other papers.

Wednesday, August 5, 2015
Re-Examining Your Creative Process: Making the Most of Your Patterned Paper - Day 3
Thank you for your warm wishes for my involvement at The ScrapRoom. I intend to keep you informed by posting updates with the new ScrapRoom kits, showing you some close-ups of our designers work and helping you "Get More Pages Done" with tips, recipes or challenges. I'll probably continue to throw in some Sneak Peeks at the end of the month too. :)
Today I wanted to continue with the Patterned Paper Series. For those of you just joining us, Brenda Carpenter ran a series of classes on patterned paper that shared several of her tried and true methods to work with patterned paper. Every class has at least one good tidbit to consider. I, personally, have learned a lot from her. Hope you enjoy!
From Brenda Carpenter:
 3. Use Small Amounts of Patterned Paper Effectively.
Sometimes less is more. A standard way to use small amounts of patterned paper effectively is to use small 1/2 inch strips of patterned or solid paper to anchor designs, break up patterns, and add borders to photos. In this layout the skinny strip of striped paper is the base for the pink cardstock and helps incorporate more colors in the layout.
Another way to add a little touch of color to a layout without overwhelming the design is to use punches. The small hearts punched out of the patterned paper are a perfect example of this - well-placed accents of pattern and color. Punches and die cut machines are great tools for making your own accents.
Here is my lift using Crate Paper Poolside:


Today I wanted to continue with the Patterned Paper Series. For those of you just joining us, Brenda Carpenter ran a series of classes on patterned paper that shared several of her tried and true methods to work with patterned paper. Every class has at least one good tidbit to consider. I, personally, have learned a lot from her. Hope you enjoy!
From Brenda Carpenter:

Sometimes less is more. A standard way to use small amounts of patterned paper effectively is to use small 1/2 inch strips of patterned or solid paper to anchor designs, break up patterns, and add borders to photos. In this layout the skinny strip of striped paper is the base for the pink cardstock and helps incorporate more colors in the layout.
Another way to add a little touch of color to a layout without overwhelming the design is to use punches. The small hearts punched out of the patterned paper are a perfect example of this - well-placed accents of pattern and color. Punches and die cut machines are great tools for making your own accents.
Here is my lift using Crate Paper Poolside:

Since the photograph that I had of myself from a gazillion years ago was sized funny, I used very unusual measurements. For today's instructions, I am going to defer to Brenda's instructions as her measurements are much more typical of a photograph that you might consider for this layout. If you like my color and paper scheme to this layout, I added in items from the August Embellishment Kit and August Patterned Paper Kit, as well as border strips from some of the papers. I, also, added gold twine and a bit of Stickles on the edges of a couple pieces of ephemera that weren't already outlined. The bow was made from a die cut. Please do not hesitate to ask any questions if I can clarify anything as to this layout.
I, also, thought that I might share a picture of my layout before I added all of the embellishments.
I, personally, find it a lot easier to heavily embellish a page when the patterns are used in small bits. I did add the punched pink patterned paper at the base of my picture after I thought that the page could use just a touch more pattern. Brenda had nicely grounded her photo with the striped paper and I wanted to use a touch of pink.

Without further adieu, here are Brenda's instructions on her layout with customary measurements. Please print these instructions and adjust them with Crate Paper Poolside or some other fabulous TSR kit.
- Photo is matted 4 x 6 inch, text was added in Photoshop.
- Base of layout - Yellow cardstock, add 4 x 12 vanilla cardstock along the right edge.
- Trim an 8.5 x 8.5 inch square of green floral paper (TIP: make sure that you cut out the inside paper that will be covered in the design. This is a great way to stretch your supplies. Cut out the flowers to use on your layouts and cards. )
- Trim pink cardstock to 6.5 x 8 inches.
- Trim striped paper to 1/2 x 8 inches.
- Cut out large scalloped and pink decorative pattern from the Cherished sheet of patterned paper add-on. If you don't have this paper, simply substitute strips of scalloped edged cardstock.)
- Punch out three hearts from scroll paper and one from red cardstock (I used a Martha stewart crafts heart punch.)
- Add chipbard accent and ribbon attached with a decorative brad.
Tuesday, August 4, 2015
ScrapRoom Updates
Good Morning! I want to let all of our members know of a few recent changes we've made at The ScrapRoom. First, I am so excited to announce that Janine Rachau, our Guest Designer for the past three months, has agreed to join our Design Team on a permanent basis. In addition to designing for our gallery, Janine will be stepping into the much-needed role of Blog Coordinator here at The ScrapRoom, and she will most definitely bring a lot of energy and structure to the blog. I am so excited to have her in both of these roles, and I look forward to her inspiring layouts in the gallery and her motivating ideas on the blog!
Second, we have decided to make our Project Life Kit an every-other-month release of 5-6 product lines instead of a monthly release of 4 product lines. We want to include more pocket-style scrapbooking products in our Project Life Kits to give our members more value for their shipping dollars. So, beginning with the September 2015 Project Life Kit, we will be increasing the amount of product in each kit, but we will only be shipping these kits out every other month. The cost of the larger kits will be $23.95 (member price), and each kit will include at least 5-6 product lines of cards and coordinating embellishments. Shipping costs will remain the same at $7.99/shipment for US customers and actual shipping costs for international customers. We think this is a great change that will allow us to include more pocket-style products from your favorite manufacturers. If you are already a member of our Project Life Club, your membership will automatically convert to the new every-other-month structure. (As with all of our Clubs, you are free to skip any shipment that you do not wish to receive or cancel your membership at any time.)
If you would like to join our Project Life Club, you can get the next kit reserved by signing up here! JOIN THE PROJECT LIFE CLUB
Welcome Janine!
Second, we have decided to make our Project Life Kit an every-other-month release of 5-6 product lines instead of a monthly release of 4 product lines. We want to include more pocket-style scrapbooking products in our Project Life Kits to give our members more value for their shipping dollars. So, beginning with the September 2015 Project Life Kit, we will be increasing the amount of product in each kit, but we will only be shipping these kits out every other month. The cost of the larger kits will be $23.95 (member price), and each kit will include at least 5-6 product lines of cards and coordinating embellishments. Shipping costs will remain the same at $7.99/shipment for US customers and actual shipping costs for international customers. We think this is a great change that will allow us to include more pocket-style products from your favorite manufacturers. If you are already a member of our Project Life Club, your membership will automatically convert to the new every-other-month structure. (As with all of our Clubs, you are free to skip any shipment that you do not wish to receive or cancel your membership at any time.)
If you would like to join our Project Life Club, you can get the next kit reserved by signing up here! JOIN THE PROJECT LIFE CLUB
Monday, August 3, 2015
Daily Inspiration: Layout of the Day! August Sketch!

Rochelle created a super-fun layout for our sketch this month using Simple Stories So Rad. I love her dimensional elements too! You can see the details in the close-ups below.


Subscribe to:
Posts (Atom)