Sunday, June 30, 2013

Sneak Peek #6: Cosmo Cricket Sweet Disposition (FOTM)

"Water Taxi" by Jennifer Moore
"Trendy and pretty all the way through. Who doesn't love cameras, banners and mopeds in happy colors and sprinkled with paper bits?" -- Cosmo Cricket blog

Saturday, June 29, 2013

Sneak Peek #5: WRMK Happy Campers (FOTM)

"Family Vacation" by Melanie Call
"The Happy Campers collection takes a whimsical and fun approach to camping with icons reminiscent of hiking, star gazing, camp fires, and who couldn’t resist – s’mores. Look for an earthy color pallet mixing various shades of brown with a light touch of green and aqua. This collection also features a variety of textures that would be seen during outdoor adventures such as wood grain, constellations, wild flowers, trails, and more." -- WRMK blog

Friday, June 28, 2013

Sneak Peek #4: Teresa Collins Summer Stories (DS)

"Finally Stuck" by Theresa Sovacool
"I was inspired by my daughter Gentry's upcoming Summer wedding. I wanted a line that was could be universal in theme, but would be a beautiful mix of Summer colors.  I decided to do yellow for sunshine, summer and to "catch" the feel of all things pretty." -- Teresa Collins

Thursday, June 27, 2013

Sneak Peek #3: Jillibean Soup Chilled Cucumber Soup (FOTM)

"Project Life Week 25" by Aphra Bolyer
"This line was totally inspired by the Cherish Banner Bites.  I love, love, loved the color combo so decided to do a whole line around it.  I think you'll like it too."  -- Jillibean Soup blog

Wednesday, June 26, 2013

Sneak Peek #2: Bella Blvd All American (DS)

"Things That Define My Life" by Theresa Sovacool
"All American is my debut patriotic collection; you’ll be seeing stars in the July sky this summer as scrapbooking and paper crafting stands united with All American!" -- Bella Blvd Studio blog

Tuesday, June 25, 2013

Sneak Peek #1: Fancy Pants Swagger (FOTM)

"A Fan'stache'tic Halloween" by Jennifer Moore
"Stylish patterns and cool colors make this line a must have for the young, the not so young and the older gents in your life!" -- Fancy Pants blog

Wednesday, June 19, 2013

Project Life: Weeks 23 - 24

Hi there!  I'm back today to share the rest of my Project Life pages, along with a few tips and tricks to help make your albums come together a little easier.

Project Life: Week 23


As I mentioned in my last post, I started a Disney album especially for those pictures, especially since I have two years' worth to document.  However, in our regular Project Life album, I wanted to include something from Disney.  Mostly to explain the lack of pictures from June 2012.  And, to avoid repeating a lot of the pictures, I made Week 23 a one-pager.  There is no reason every week has to be two pages.  That little epiphany has made Project Life a whole lot easier.

The papers are mostly from the Project Life Add-On Kit, except for the blue patterned paper for the journaling card.  That is from the Carta Bella Summer Cool Summer kit.  

One last thing.  I only had family pictures from Epcot to include on this layout, but I really wanted to include one of the Castle or some other iconic spot.  However, I took those pictures when we went in 2011, so I went online and found the pictures of Walt and Mickey and the close-up of Mickey online.  I saved them with my regular pictures and had them printed at my local Wal-Mart.  Love that trick!


I bought a pack of bling Mickey heads and button Mickey heads from my local craft store, and I am including them on all my Disney pages.  It's sort of like hidden Mickeys for my family.  Fun!


The week after we got home from Disney, my oldest son went off to church camp for a week.  I had a lot of pictures of camp, and I wanted to include them all.  So I decided to create a one-page and a two-page layout.  You gotta love the flexibility of Project Life!

Project Life: Week 24


For this page, I used Basic Grey's Hipster, which is in the Flavors of the Month and Project Life kits.  My whole goal was to figure out a way to use the cute flags.  I ended up tucking them behind the chipboard star on my title card.


Project Life: RYC (Reformed Youth Camp)


I am so thankful to even have these photos since I didn't send my son to camp with a camera.  The pictures were taken by various campers and counselors and posted on the camp's Facebook page.    


The cards on this double-page spread are all from the Project Life Add-On kit.  This page went together pretty quickly due to the We R Memory Keepers precut cards.  All I added was some journaling and stickers. 


Here's a neat tip.  I had my son do the journaling for these two pages.  Even though it was like pulling teeth to get him to write a few sentences, I think he will appreciate this in a few years.  He wrote about his cabin, fellow campers, and favorite activities.  


I hope you enjoyed this month's Project Life pages and were able to find some inspiration for your own album.  And can you believe that we're halfway done with this year?  Having half the year documented and IN an album is thrilling to me!!!

Monday, June 17, 2013

Use Up Those Scraps!

Seeing Aphra's "Project Disney" layouts really inspired me to take another look at some leftover Disney World photos I've had in a box since 2009.  I've scrapped lots of Disney pages from that trip, but I still have a lot of "extra" photos that are too special for me to just throw out. It might be the look on someone's face in the picture....a little detail that captures a special moment...you know what I'm talking about.  I printed almost every single Disney photo because each one, even though it may be similar to another photo, helps capture something special that I didn't want to forget.  I'm sentimental like that. ;)

Anyway, scrapping every single Disney photo that I took is probably not 100% possible, but using the "Project Disney" style of layout certainly helps get those photos into the album and the stories told!  So....here's what I did:

Using my leftovers from the June kit, I cut papers down to the sizes I needed to fill each pocket, added a few small embellishments or Disney stickers that I've had forever, and added photos. Once my journaling was written, I had 8 Disney photos scrapped and documented!  It was SO easy and SO fast!  And, it's the perfect way to kill some TSR kits. 

Pull out a couple of divided page protectors, some leftover TSR kits, and see what you can create. Every photo scrapped is a memory documented forever.  That's really what it's all about, right? :)

- Jenny

Wednesday, June 12, 2013

Tips & Tricks: WRMK For The Record

I learned a few things while putting this recipe card layout together, so I thought I'd share!

(Wait, have you seen our recipe cards?  You can access cutting instructions and photo sizes used - getting more pages done doesn't get any easier than that!)

The first thing I learned is that 12x12" paper doesn't fit in my printer.  I know, right????  LOL  I'm so used to doing 8.5x11" pages that printing my journaling is just one of those things I don't think about.  I loved the WRMK just as is, so I didn't want to cut it up just to make it easier to work with.  Except... I *could* cut it up if I was careful!
The first thing I always do, especially if I'm going to print my journaling right on the paper, is lay out my pictures and figure out where the journaling will fit.  Sometimes I just measure it, other times I'll make a few light pencil lines.
I cut the paper right along the line WRMK gave me.  *grin*  You can see I have a few pencil lines drawn for my journaling space.  I knew it would get confusing if I cut up the paper and tried to remember which edge was what without the guides.
I journaled and printed onto some plain printer paper.  Next step is to tape the good paper on top - I use a lightbox, but a window works really well, too!
I sent the good paper (taped onto the printer paper) back through the printer and taped it all back together.  You can see the pencil lines really helped me line things up!
And this little date/title block?  Oh, I could hand-write in there... but that totally freaks me out!  My brain can't handle too much handwriting (I think it's because I'm a control freak *wink*).  So I did the same trick here:  cut out the element, printed up some journaling to fit, and then printed on the block. 
Back in place.  You can't tell, especially once it gets put into a page protector. 
The other thing I learned is that sometimes things happen that you *can't* control.  GASP!  I know, right????  My pleated cardstock strip is an example of that.

I intended to just sew one nice straight line of stitches through the center of the strip.  Well, I got it, sort of, but my machine was making this horrible noise and it was eating thread like crazy.  And I was a little annoyed.  I got a bunch of beautiful variegated silky thread for Christmas and it was just whizzing off the spool!  I turned over the paper and discovered that the tension was really messed up and made this amazing loopy texture.  Hmmmm... that would look really cool on TOP of my page...  So I turned the page over, crossed my fingers, and sewed near my first sewn line.

And it worked!  And I have no idea how to do this again on purpose.  But I'm glad I ran with it - this ended up being one of my favorite pages of all-time.

Oh, and the photos?  I don't have Instagram (maybe I'm one of the last people on the planet?) so I downloaded a free app named Pixlr-o-matic onto my desktop.  Tons of fun filters and effects!  And you can turn your rectangular photos square, too!

Hope you are inspired to try something new - or to turn a stumbling block into a jumping off point.  You may just love what happens next.  *big love*

- Theresa/Savi

Monday, June 10, 2013

Project Life Goes Disney!

When I began organizing my pictures for this month's Project Life pages, I discovered that I had four pictures in my June 2012 folder.  Wha???  Then I remembered that we went to Disney World that month.  My Disney 2012 folder has 483 pictures in it.  So, guess what?  Project Life went Disney.  Rather than include these layouts in my regular Project Life album, I started a new album just for my Disney pics.  Here are the cover and first three pages of the album.  You can click on the photos to see them larger.

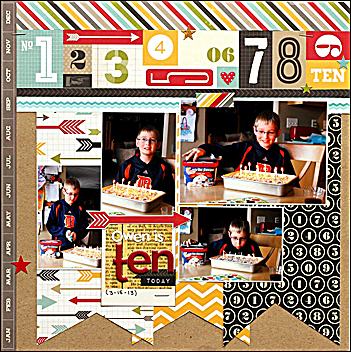
Disney 2012 Cover Page


The colors of the new Simple Stories 24 / 7 line were perfect for my Disney cover page.  I needed black, yellow, and red to match the Mickey Mouse paper and chipboard that I bought right after our trip.  Lucky me!


The title card was so super simple.  I rounded the corners and added the word Disney using the Simple Stories Snap alphabet sticker sheet.  Then I added some strips to a piece of 6" x 4" Mickey Mouse paper and put my date on top.  


Finally, I made another 6" x 4" card from the yellow chevron paper.  A punched heart and a notched paper strip was enough to embellish it.  The chevron flair and Mickey Mouse button are attached to the outside of the sheet protector.  Since both of those embellishments are pretty thick, this keeps my sheet protector from puckering up.


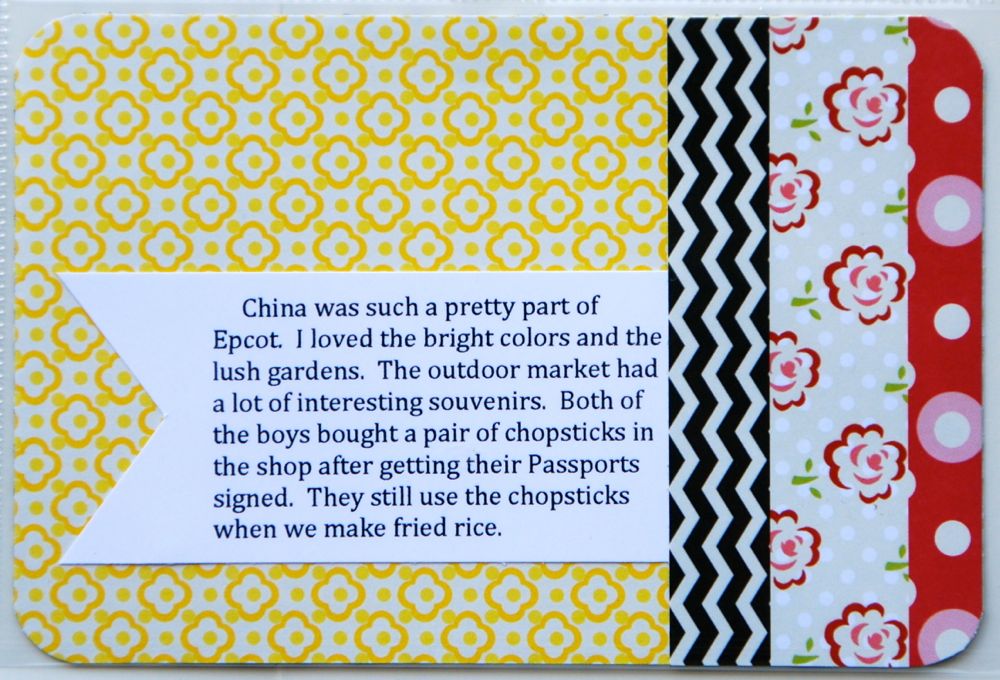
Project Disney: China


For this layout, I used Lily Bee's Sweet Shoppe patterned paper along with some cards and embellishments that I made.  For the little panda card, I used my punches and a variety of tutorials that I found online.  If you do a search for paper punch art, you can find so many amazing creatures made with just punches and paper.  I didn't have some of the punches in the tutorial that I found so I improvised.  I like how he turned out.   


For the three Chinese symbols on the page, I simply copied and pasted them from the internet and printed them onto white cardstock.  It was easy to cut them into the 3" x 4" size of the pockets and move on.


The title card on this page might just be my most favorite title card ever.  After searching around online for the Chinese symbols, I kept running across the Chinese flag.  At first I was planning to print it out, but then I found the yellow Mickey head button and decided to recreate the flag.  It was so much easier than trying to create the Mickey Head Flags that I saw in Epcot.  


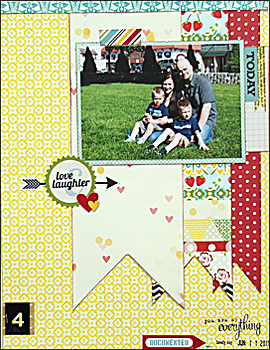
Project Disney: Norway


Our lunch with the princesses at Akershaus was a perfect fit for Carta Bella's Cool Summer kit.  LOVE the chevron paper, especially!  As for the pictures, did you notice that I cut the 5x7 photo of the boys with Belle into three photos so that it would fit in the divided page protector?  I was really hesitant about doing it, but in the end I like it.  The Once Upon a Time card below was created from the envelope that the picture came in.  


For this filler card, I wanted to highlight a pink Mickey head button that came in a pack of buttons from my local craft store.  To keep my photo pocket from puckering up, I actually placed the button on the outside.  You can't even tell and it is staying in place just fine.


Project Disney: Mexico


For my Mexico page, I used a variety of cards from the Project Life Add-On Kit.  The reds and oranges really went well the look and feel of the pictures.  One of the filler cards is a Mexican symbol that I found on the Internet.  I saved the picture, added it to a Word document, printed it onto white cardstock, and then cut it down to 3x4".  Oh, and here's another trick.  I didn't have quite enough pictures for this layout, so I found a couple online.  I simply saved them with the rest of my pictures and uploaded them to print.  I will definitely be doing that more often for my Disney album.  


My title card was really simple, and I felt like it needed a little something.  This small orange Mickey head button was a perfect addition to the "o" in my title.  Like my own little hidden Mickey.

Thanks for popping in today.  I hope you are inspired to think outside the box with your scrapbooking supplies and use them for whatever photos that you have!  See you soon with the rest of my June Project Life pages.

Friday, June 7, 2013

Hey, Dude!

So... here's a public service announcement:  It's Father's Day in the U.S. in a few weekends.

Some of you have just mentally thanked me (you are welcome).  *grin*  Some of you have shrugged.  We don't get to choose our dads, do we?  And some are sad.  (I'm sorry.)  *sniffles*

But you know what?  All those feelings and responses... they all have a story behind them.  And that story... have you recorded it?  If not for your family, how about for yourself?  That's why we scrap and make cards, right?  Right!  And I've discovered that I've done a lot of that over the years.  Coolness.  Man, the memories as I went through my pages!  [Feel free to click the images and make them larger... warning, some of the journaling gets mushy!  LOL]

So if you want, make a card for your dad.  Or maybe a layout about what you've learned from the number one man in your life!

Not wanting to go there?  What about a guy in your life that deserves some props?  Yeah, you're thinking of someone right now that you love and adore.  Husband?  Grandpa?  Brother?  Guy friend?  Turn your scrappy awesomeness towards documenting those relationships!

Got a case of the "remember when's" and sitting and wishing for the days that used to be?  Then scrap those, too.  People may change, but memories don't.  If you want to celebrate what you had, by all means - do it.  No one said scrapping is only about the here and now!

So, just like every other holiday out there, Father's Day comes with emotions.  Embrace them, and turn it into something that works for YOU.  Remember, the scrapbook police and card crazies are not coming over.  No rules, just life.  And it's all good.  *smiles*

Happy scrappin'!

- Theresa/Savi

Wednesday, June 5, 2013

June Sketch Challenge... and the May Sketch Winner!

Did you get a chance to play along with us on National Scrapbooking Day?  Yes?  No?  Hey, no worries - we're bringing back one of the inspiration sketches we used that day as our sketch this month.  Yeah, we loved it so much we wanted another shot at it.  *big smiles*
June ScrapRoom Sketch by Tammy Harp
"Owen is Ten Today" by Brenda Carpenter
"Love & Laughter" by Melanie Call
"Frozen Yogurt" by Jennifer Moore
"Golf" by Theresa Sovacool
Wide banners, stacked banners, sideways banners:  however you want to use this sketch is fine with us!   Give it a try for a chance to win a $10 gift certificate to The ScrapRoom Store.  Just link up your take on our sketch in the comments below. 

And it's easy to win!

Just ask Cathy van de Bruinhorst - she's our May ScrapRoom Sketch winner.  I absolutely love these precious photos of this grandpa and grandson.  And I can just hear the conversation they're having!  *big love*
"Tell Me More Grandpa" by Cathy van de Bruinhorst
Congratulations, Cathy! Please email Tammy at admin@scrap-room.com with your name, address, and the name of the contest you won. She'll get your prize to you right away. Happy shopping! Don't forget to link up your sketch layout for your chance to win a shopping spree next month. Good luck, and have fun with it!

- Theresa/Savi