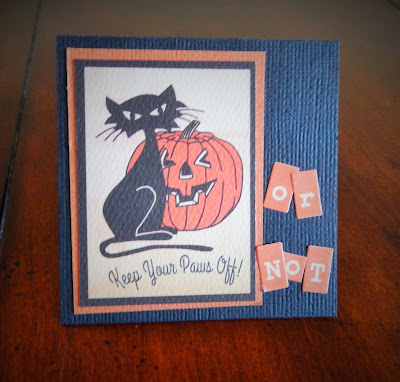
Today, includes tips from Brenda C. from the conclusion of working with her first kit collection. Her notes read, "Use your leftovers to create smaller layouts and cards. Here are some examples. Note how I used the design principles above on the layouts and cards below." I'm pretty sure that she is referring mostly to her note #3 from this section on using small amounts of patterned paper effectively. You may read more about it from Day 3. She used those notes to create an 8x8 layout, (Day 4, which I converted to a 12x12), and then the following two cards that I lifted:
I have altered her notes to leave the specific instructions to complete my cards with the Carta Bella Trick or Treat line.
"Keep Your Paws Off! Or Not" card
- Trim black cardstock to 3 x 6 inches; fold in half for card base.
- Trim framed cat box from Trick or Treat sheet being careful to leave a black frame evenly on all sides.
- Matte the design onto Squash or Amber cardstock.
- Adhere design to card and add sentiment stickers.
"Halloween October 31st" card
- Trim pale teal cardstock to 4.25 x 11 inches; fold in half for card base.
- Trim striped paper to 4.5 x 2.5 inches. Trim harlequin pattern 3/4 x 4.5 inches.
- Trim and punch black cardstock to 3/4 x 4.5 inches.
- Adhere a ribbon strip above scalloped border as, shown.
- Punch or cut photo corner out of orange cardstock and adhere to corner of striped paper.
- Adhere sticker onto orange cardstock, trim close to outside edges of sticker with straight cuts, matte with black cardstock and adhere to front.
Next installment comes in a week and uses this month's Pink Paislee line, Memorandum. If you are willing to leave any link-ups to your interpretations in the comments, I would love to see what you create!
Re-Examining Your Creative Process - Day 4


No comments:
Post a Comment