Monday, November 30, 2015

December Sneak Peek #6

PINKFRESH STUDIO CHRISTMAS WISHES
Layout by PinkFresh Studio designer, Agnieszka Piskorz, and found on the Pinkfresh Studio Blog.

Tell your Christmas story in style with our very 1st holiday collection, Christmas Wishes. ... Christmas wishes feature a traditional Christmas red color along with some neutrals, light blue and aqua. -- Pinkfresh Studio Blog.

Sunday, November 29, 2015

December Sneak Peek #5

AMERICAN CRAFTS SHIMELLE'S CHRISTMAS MAGIC

This terrific line will be part of the December 2015 Flavors of the Month Kit. The picture was found on the American Crafts Blog.

Celebrate the season with Christmas Magic by Shimelle! This colorful collection boasts a pleasing, retro palette of berry red, deep evergreen, woodgrain and sky blue. Delightful icons of toy trains, Santa, vintage Christmas lights, and classic toys join pretty patterns for a truly magical collection! -- American Crafts Blog

Saturday, November 28, 2015

December Sneak Peek #4

FANCY PANTS WISH SEASON


Layout by Fancy Pants designer, Kim Watson, and found on the Fancy Pants Blog.

WISH SEASON is a whimsical mixture of holiday & winter motifs and patterns. You will find wonderful, traditional holiday items with a modern twist, as well as unique, doodled characters, hand painted patterns & hand drawn elements. -- Fancy Pants Blog.

Friday, November 27, 2015

Freaky Fast Sneak Peek!!!

Our final Freaky Fast November Page also gives you a sneak peek at one of the December lines that will be making an appearance in the December Doubleshot Kit!

October Afternoon's Under The Tree

For the Freaky Fast page, Tammy Harp used the November formula and cut (6) 2"x 6" strips of patterned papers and arranged them across the bottom of the page. This is what Tammy said about it:

            I had to do just a wee bit of overlapping in order to leave a narrow black margin along
            both sides. I added a 1/2" strip of brown sugar cardstock along the top of the patterned
            papers, and I matted (2) 4"x 6" photos (or what will be (2) photos) with the same brown
            sugar cardstock. I finished the layout by added som die-cuts and stickers, and a couple
            of phrase cut-outs from one of the papers. Easy - and Freaky Fast!!

Here's one final look at all of the November Freaky Fast layouts, all created using the same formula:
(2) 2"x 6" pieces of patterned paper

by Designer, Rochelle Spears

by Designer, Brenda Ragsdale

by Guest Designer, Lisa Lahiff

Thursday, November 26, 2015

December Sneak Peek #2

SIMPLE STORIES CLAUS & CO. 
Layout by Simple Stories designer, Sue Kendall, and found on the Simple Stories Blog.

Today we introduce you to Claus & Co, the perfect collection for all of your holiday crafting projects this season.  The traditional holiday color palette mixed with accents of red glitter foil make Claus & Co a 'must have' addition to your holiday wish list! -- Simple Stories Blog.

Wednesday, November 25, 2015

December Sneak Peek #1

ECHO PARK PAPER STORY OF CHRISTMAS
Christmas Countdown project by Echo Park Paper Co. designer, Courtney Lee, found on the Echo Park Paper Co. Blog.

We believe this holiday collection is sure to bring you cheer. Introducing “The Story of Christmas” in which Santa and your favorite reindeer take you on a journey through the North Pole. Visit Santa’s workshop and whip up a holiday gift or two of your own as we transform you into an elf perfect for delivering gifts to those you love. It’s a bit of holiday magic rolled up into one merry collection. And it’s our gift to you! -- Echo Park Paper Co. Blog.

Monday, November 23, 2015

Daily Inspiration: Layout of the Day!


Were you around when The ScrapRoom hosted challenges for creating a 4 in 1 layout?

Lisa Lahiff created a creative and meaningful page, this month, with three of the kits represented in her layout, a 3 in 1!  Do you recognize the different lines represented?

Sunday, November 22, 2015

Frugal Paper Tip

The Plaid Paper, you see below, from The ScrapRoom's November 2015 Pattern Paper Kit is included as part of the PhotoPlay Autumn Day line.  It is a beautiful warm plaid on the front and an awesome clean newsprint design on the back.  Seriously, could you ever have enough of a sheet of paper like that?  I cannot.

But, since I only had one sheet, I wanted to maximize the design.  Although the newsprint had me enamored, I wanted to use the "cozy" plaid as much as I could.  On the layout below, I chose to use the Coffee Cardstock as the base and cut the plaid pattern to use on two layouts.  

My cuts are as follows:

The sides were cut 1.5 inches from the edge and the top and bottom were cut 2.75 inches from the edge to cut out the large hole.

The smaller rectangle was cut out from the edges of the smaller piece of patterned paper, as well, to create the mat. I cut one inch from the sides, and .75 of an inch from the top and bottom.  This left me with a frame and a 5x7 inch mat out of that piece.  

The large piece and mat were used on the "Cozy Fall" layout below:


The frame was reserved for my "Fall in Love" layout from the PA Renaissance Faire.


Which sheet(s) are you wanting to maximize the use of?

Friday, November 20, 2015

Freaky Fast Friday!!!

Are you finding yourself being swept into the holiday hustle and bustle? I sure have.  I just know January will be here in a flash.  Just thinking about all the "To Do's" from now until then has my head spinning.
If you're looking for a way to fit in a quick page, I can assure you that the Freaky Fast pages will accomplish this.  Lisa proved it to me just this week.
When we were changing up our blog plans through November, our dialog went like this:
Janine Rachau
November 16 at 10:06am
Lisa Bankes-Lahiff, I'm wondering if it isn't too late for you to literally come up with a "Freaky Fast" Page for the November 20th post.....
.....some exchange of explanations of what was needed ...
Janine Rachau So, using the Nov 2015 kit you need 6 pieces of patterned paper. You choose a cardstock and fit the pieces together to your liking.
November 16 at 2:11pm

Lisa Bankes-Lahiff Thanks Janinesmile emoticon Will get busy!
November 16 at 2:12pm
Lisa's page was finished and uploaded by November 16 at 3:37 pm
Freaky Fast, right?!

The November 2015 Freaky Fast formula...
(6) 2"x 6"

It's as easy as 1,2, 3,...(and 4)!!
1. Collect as many pictures as you like.
2. Cut your patterned paper to the dimensions stated above.
3. Push the paper around your cardstock till you achieve the look you want, or simply lift one of the layouts below!
4. Adhere and EMBELLISH! It is that easy!!

Here's Lisa's quick and fun page using Bella Blvd Family Frenzy from the November 2015 Flavor of the Month Kit:
 
And a recap from last week:

 Rochelle Spears offers her fun take on the formula for inspiration using this month's Bella Blvd line, Family Frenzy.

Recapping last week, Brenda Ragsdale created hers with this month's Bella Blvd line, Family Frenzy, also. (Great minds think alike!)  :)

No hustle and bustle, just "Freaky Fast" pages!! 

Thursday, November 19, 2015

Lisa's Quick Cards

Hello!  It's Lisa here today, and I am writing to share how I created two greeting cards very quickly while using up some of my scraps from this month's kits at the same time!  For my first card I used left over scraps and embellishments from the Pink Paislee Cedar Lane Collection as shown in the photo below.

After trimming my scraps down to fit a 4 ¼ x 5 ½” card base I then adhered the sentiment to my acetate tag.  The hearts were diecut from the pink strip and I added some gold stickles.  Then it was all layered onto my card base using a mix of foam adhesive and liquid glue.  And viola!  This card took probably 10 – 15 minutes to make…

My next card uses scraps and embellishments from the Bella Blvd. Family Frenzy Collections…

To create this card I started by adhering the red patterned paper onto my cardbase.  I then diecut the yellow paper into a smaller rectangle, adhered it to the base and added the corner sticker.  Finally I had trimmed the green stripes and red hearts from the boarder paper and laid them horizontally over the yellow and red panels.  I then applied some baby powder to the back of the I love you sticker and popped it up with some foam adhesive.  Another 10 minute card in the bag!

My favorite thing about these cards is not just how fast they were to make, but it also used up my scraps so no need to waste anything in my kits!

Thanks so much for stopping by and we would love to see what cards/projects you are currently making with your kits!

Wednesday, November 18, 2015

Monday, November 16, 2015

Daily Inspiration: Layout of the Day!

How beautiful is this page from Brenda Ragsdale using BasicGrey's Sunkissed from our November 2015 Doubleshot Kit?

Sunday, November 15, 2015

Cards on a Sunday

Using Pink Paislee Cedar Lane:

Rochelle Spears

Janine Rachau

Janine Rachau

BasicGrey Typeset:
Rochelle Spears

Bella Blvd. Family Frenzy:
Janine Rachau

PhotoPlay Autumn Day:
Janine Rachau

And from our Doubleshot Kit, using Simple Stories, We Are Family:

Rochelle Spears

Janine Rachau

Check back on November 19th!! Lisa Lahiff offers up a tutorial to make two additional cards with this month's Flavor of the Month kit.  Have a great day!


Friday, November 13, 2015

November's FREAKY FAST FRIDAY!!! Part 2!!

Yay!! It's another Friday!!! Any good weekend plans?  Here on The ScrapRoom Blog we have yet another good reason to celebrate it being Friday, because it is...

FREAKY FAST FRIDAY!!! 
Here's the concept.  Sometimes, scrapbooking can be overwhelming...too many photographs, so many supplies, tools and techniques.  
Where do you begin?
May I suggest FREAKY FAST Formulas!
Here's how it works.  Each month, we will introduce a basic formula to use to get a page done.   They will be simple instructions to choose a base paper to start your page along with instructions to cut pattern papers to complete a page. It's that easy!! Tammy's kits are perfect too,...just grab a bag and you're ready to go!
Without further adieu.....The November 2015 Freaky Fast formula...
(6) 2"x 6"
That's it! Let's see what ya'll will come up with!! 


It's as easy as 1,2, 3,...(and 4)!!
1. Collect as many pictures as you like.
2. Cut your patterned paper to the dimensions stated above.
3. Push the paper around your cardstock till you achieve the look you want, or simply lift one of the layouts below!
4. Adhere and EMBELLISH! It is that easy!!

This week, Rochelle Spears offers her fun take on the formula for inspiration using this month's Bella Blvd line, Family Frenzy.

Recapping last week, Brenda Ragsdale created hers with this month's Bella Blvd line, Family Frenzy, also. (Great minds think alike!)  :)

Hope you will join us this month!!

Thursday, November 12, 2015

Daily Inspiration: Layout of the Day!

Guest designer, Lisa Lahiff, created the adorable November Recipe Card layout for the Photoplay Autumn Day line from this months Flavor of the Month Kit.  If you are a subscriber, all recipe cards are up now on the Recipe Card page.  To download your recipe cards use the password included in your  monthly kit.  Enjoy!

Wednesday, November 11, 2015

Daily Inspiration: Layout of the Day!


Featuring Brenda Ragsdale's terrific Bella Blvd's Family Frenzy layout from the November 2015 Flavor of the Month kit.  Her patterned paper use is fantastic!

Tuesday, November 10, 2015

Re-Examining Your Creative Process: Making the Most of Your Patterned Paper

Welcome to our last installment of the Patterned Paper Series for November.  Today's notes talk about using large shapes with your patterned paper.  I made a hand drawn leaf that I scanned. You may use if you can copy and resize it.  Otherwise, you may email me a request and I'll send you a word document copy that reflects the leaf in the exact size.
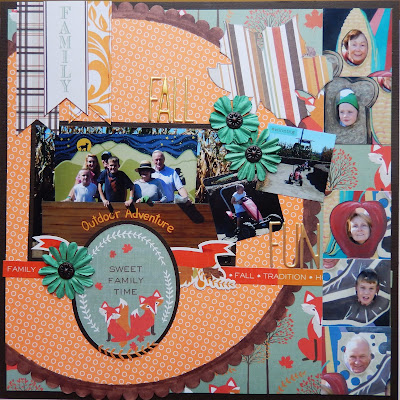
I, also, used an old scalloped circle paper from my stash along with the PhotoPlay Paper Autumn Day line from The ScrapRoom's November 2015 kits.

Brenda Carpenter's notes read, as follows:

1.  Cut Large Shapes out of your Patterned Paper.  An easy way to transform your paper is to cut it into shapes that enhance your layout. Some of my favorite shapes are circles, flowers, hearts, and stars.  You can free-hand your designs or trace chipboard or other objects (plates and bowls work great for large circles.) I used this technique to create the large heart shown in the layout below, (actually the image on Brenda's paper above.) Note that I used a tone-on-tone print, which will read as a solid on your layout and help balance the compelling patterns.

Another way to achieve this look is to use die-cut shaped papers and cardstocks that are available/  The blue polka dot circle works with the large brown floral for two reasons.  The green border breaks up the two patterns and the blue dot is a small print that reads as a solid color in the layout.  The large and small patterns work together without overwhelming the layout and photos.

"Fall Fun" [12 x12 inch layout] - (Brenda's instructions adapted to my layout.)
  • Photo sizes - 4x5, (7) 2x2 inches
  • Start with brown cardstock as a base.
  • Trim Foxes to 11,5x11.5 inches.You will be covering up most of this paper, so make sure that you cut out the inside to use on other designs.
  • Trim approximately 2.5 inches off of scalloped circle cardstock or patterned paper.  I used a large scalloped circle from my stash and colored the outside rim with a brown marker to tie it in better to the PhotoPlay Autumn Day line.
  • Cut out maple leaf from Multistripe - approximately 4x3.25 inches.
  • Matte largest photo with brown paper.
  • Cut banners and "Sweet Family Time" oval from patterned papers.  Matte oval with brown paper.
  • Assemble layout as shown using sticker sheet, cut shapes and flowers with brads from stash to match.
**Tip: Brenda used the large circle to create another layout that should be our next installment.  I, however, used the "Foxes" paper cut out for other purposes.  You will see her 8x8 inch layout in a future blog post.

Also, I did take Brenda Carpenter's handcut heart idea and applied it to a different layout that I created with the November 2015 kits:

Have a wonderful day!!!

Monday, November 9, 2015

Daily Inspiration: Layout of the Day!


Rochelle Spears created this pretty layout with Simple Stories We Are Family from the November 2015 Doubleshot Kit.  I love how Rochelle imitated the heart circles from the circle cluster that is an image in the design of the paper by creating a few of her own and adding them on the top left side of the paper.

Sunday, November 8, 2015

Quick Tip: Faux Washi Tape

Hi there TSR friends! Aphra here today to share a quick and easy tip with you. It's great for your Project Life cards as well as scrapbook pages and cards. Faux washi tape!

First, as for supplies, you need a pair of scissors and a small strip of patterned paper. I used the two narrow strips from the bottom edge of the Pink Paislee Market square paper that came in the November Project Life Kit.

Use your scissors to cut a wavy, beveled edge at both ends of a short strip of paper. The idea is to make it look like you tore off a piece of washi tape. Then adhere that strip onto your project as though it is holding down a photo or card. Here is my example.


Such a simple little trick, but I love how it really grounds the coordinating puffy stickers that came in this kit. So before you throw away the perforated strips of paper that come on the edges of your 12x12 paper sheets, see if you can use a bit for some faux washi tape.

Thanks for stopping by!

Friday, November 6, 2015

November's FREAKY FAST FRIDAY!!!

Happy Friday! I hope that you are gearing up for the weekend, and, that you are going to be able to get some scrapping done this weekend.  Want some help?

FREAKY FAST FRIDAY!!! ...to the rescue!
Here's the concept.  Sometimes, scrapbooking can be overwhelming...too many photographs, so many supplies, tools and techniques.  
Where do you begin?
May I suggest FREAKY FAST Formulas!
Here's how it works.  Each month, we will introduce a basic formula to use to get a page done.   They will be simple instructions to choose a base paper to start your page along with instructions to cut pattern papers to complete a page. It's that easy!! Tammy's kits are perfect too,...just grab a bag and you're ready to go!
Without further adieu.....The November 2015 Freaky Fast formula...
(6) 2"x 6"
That's it! Let's see what ya'll will come up with!! 

It's as easy as 1,2, 3,...(and 4)!!
1. Collect as many pictures as you like.
2. Cut your patterned paper to the dimensions stated above.
3. Push the paper around your cardstock till you achieve the look you want, or simply lift one of the layouts below!
4. Adhere and EMBELLISH! It is that easy!!

And, just in case you would like a little more encouragement, we have a spoiler to show you. Brenda Ragsdale created hers with this month's Bella Blvd line, Family Frenzy.

Hope you will join us this month!!

Thursday, November 5, 2015

Daily Inspiration: Layout of the Day!

Our guest designer, Lisa Lahiff, created this sweet page with the Pink Paislee Cedar Lane line from the November 2015 Flavors of the Month Kit.  The transparent word stickers are part of the November 2015 Embellishment Kit.


Wednesday, November 4, 2015

Recipe Cards


Did you know that a monthly password is included in The ScrapRoom Flavors of the Month Kits for access to full detailed instructions to create four double page spreads, (one DPS for each line in the Flavors of the Month Kit)?  Above, presented is Rochelle's lovely recipe card double page spread using the BasicGrey Typeset line from The November 2015 Flavors of the Month Kit.  When you sign in to the recipe pages, you receive measurement cutting instructions, and step by step instructions to complete each of the double page spreads.  

Tuesday, November 3, 2015

Re-Examining Your Creative Process: Making the Most of Your Patterned Paper

 Today's installment from our re-visited patterned paper series, presents a larger version and lift from Brenda Carpenter's original.  It was created with the November 2015 Flavors of the Month Kit along with the Embellishment and pattern paper add-on utilizing the Bella Blvd. Family Frenzy line. Here is what Brenda said when she created her page:

***Use your leftovers to create smaller layouts and cards.  Here are some examples, (I only found this example in my binder here).  Note how I use the design principles above and in Week 1's lesson on the layout, (edited for just this layout was found.

"Little Dreamers"

  • Photos -- 4 x 6 and 3 x 3.75 inches printed with white borders.
  • Base is yellow 12 x 12 cardstock.
  • Trim 7 various patterns to 1.5 x 7 strips & white cardstock to 1.5 x 8 inches.  Use tone on tones to break up some of the busier patterns. and arrange along left side, as shown.
  • Add title and accents as desired.

Monday, November 2, 2015

November's Sketch

This month's sketch is from Pagemaps. Both Rochelle and I used Pink Paislee Cedar Lane for our interpretations.  Hope you give it a try!

Rochelle Spears

Janine Rachau