Showing posts with label Up Close and Personal. Show all posts

Thursday, September 15, 2011

Design Team Inspiration with Lan!!

Ribbon/Bookmark Tutorial -
Hi there, I"m continuing with the school theme as it's the month most of our kids get back into that routine and even some of us adults are heading back ourselves. And if you're one of those few, a big pat on the back to you!

So get your paper and scissors out because today, I am going to show you how to sharpen those pencils.

Step 1
: Pull out your scraps and cut to the following dimensions


Step 2
: Using a corner rounder, punch the eraser top & add black cats eye chalk to the edges.

Step 3: For the section of the pencil where the yellow part starts, I used my old $1 decorative scissors with the Dragonback design. You could also use pinking sheers or just cut little triangle notches.

Step 4: For the pencil top, I measured out the center point and cut it into a triangle, then using the black cats eye chalk again, I inked it.

Step 5: Now you have the completed pencil pieces, just assemble it onto a coordinating 2"x4" piece of pattern paper.

Step 6: Next I layered these on longer sheets of cardstock, and added some letter stickers.

Step 7: For the bottom, I used my Dragonback scissors again and for the top, I used my coluzzle to cut the rounded shape where the red line is.


Step 8: For the final touches I punched a small star and looped a piece of ribbon on the top.

And that completes my tutorial on these cute easy ribbons that can be given to your star student for all their hard work or recycle as a bookmark.

Thanks for visiting!

Wednesday, September 7, 2011

Up Close and Personal with Kim!!

Howdy Scrappers!!! Hope all of you have enjoyed your summers!!!! Did you take lots of pictures on those vacations???? Speaking of vacations, I can't wait to share the Double Shot kit that is going to knock your socks off! I don't know about you but Echo Park is one of my absolute favorite manufacturing companies these days. There is not one single line that I have not liked! And Speaking of Echo Park, I had the privilege of working with the "Happy Days" line this month! What is even more exciting is the extra amount of embellishments that are included in this kit!!!!! I just know your creativity will soar once you have this kit in your hands. Here is the layout I made featuring "Happy Days"...


Look at all those fabulous chipboard embellishments!!!! How fun are those papers!!!!! This kit can be stretched to the limits with all that is included!!!!!! I was also able to make a few cards as well, but guess what???? I still have more left over and you can be rest assured that I will use up every last bit of this Amazing kit.


This is my absolute favorite part of this kit....but I have to confess, chipboard is my staple on almost all of my layouts. It adds that perfect amount of dimension and texture to your page!!!! Here are those cards I was talking about....


So, are you sensing my "Happy" in "Happy Days"? I just know you are going to love this kit as much as I did!!!!! Now, Grab those vacation pictures and get to scrapping!!!!!! I can't wait to see what you create!!!!!

Tuesday, September 6, 2011

Up Close and Personal with Aphra!!

Hi there friends! Aphra here today to share some details from one of my gallery items this month. This layout is actually the last project I had created and I didn't save myself any embellishments to use. I just couldn't resist! Anyway, no worries. I just grabbed some punches and got to work.

Spring


To create my embellishments, I punched circles, scalloped circles, and butterflies from some of the Cardstock Add-on. The white circles are embossed using my Cuttlebug and Swiss Dots folder. To add even more dimension, I stacked them all together using foam adhesive. Now the layout feels full and has movement.


Both of these butterflies were made with Martha Stewart punches. Those are my FAVORITE! Do you have a favorite punch?

Have a great day!

Monday, September 5, 2011

Up Close and Personal with Lan!!

Isn't this month's kit just bursting with color?! I love the combination of hot pink and green and knew I wanted to scrap a recent photo I took of my kids before the summer ended.

The embellishments were so lumpy and bumpy, just how I love them! So much dimension it added with no work at all from my part.


The original quote ended with " but to one person, you might be the world"...I didn't have enough chipboard letters so I shorten it onto a tag with my own handwritting. I used my cricut SCAL to cut the word World and ONE using the downloaded font "Yikes".

The accordian flowers are too cute. I've tried making my own but they are never this uniform and pretty.


Have a wonderful day, I can't wait to see all the bright fun layouts in the gallery.

Saturday, September 3, 2011

Up Close and Personal with Jenny!!

Hey everyone! Jenny here with a few little tidbits about one of the layouts I created with the September TSR kit!

It's back-to-school time around here. My youngest just started Kindergarten (and mama did NOT do well with that!), and my oldest just started 3rd grade. When I saw the colors of the American Crafts "Amy Tangerine" line, I just knew I had to use it for these recently snapped pictures of my son's first day of school!


When I saw the stamp add-on, I definitely knew I was going to scrap these pictures! This stamp is so adorable, and so perfect for those back-to-school pages. I simply added a punched scalloped circle with one of the included stickers on top and outlined them both with a brown pen:


And how lovely are these fabric letter stickers?! I love these and want a pack in every color. hehehe


Lastly, I did a little "dissection" with one of the dimensional stickers in my kit. It originally said "hello friend," but I cut off the "friend" part to where it only said "hello" and added it to the beginning of my title:


If your embellishments aren't working for you, don't be afraid to change them into something that works! Sometimes, all it takes is a little snip with the scissors. ;)

Thanks for looking...you are going to LOOOOOVE the new lines and all of the extra embellishments in September's kit!

Friday, September 2, 2011

Up Close & Personal with Sarah!!

Hello everyone! Sarah here with a look at one of my layouts created with the September Double Shot kit!

Having two little ones around prevents us from going on a lot of trips and if you can believe it most of the pictures from my pre-kid trips have already been scrapped. Probably because back then I had all the time in the world to scrapbook- LOL! BUT.... That doesn't mean I don't LOVE the October Afternoon Boarding Pass collection in this month's DS kit! I love taking paper that is meant for one theme and letting it tell my story. When I saw the map papers I knew immediately I would use one for this photo of my sweet Isabel on the day she was born. It definitely "helped" tell my story. The world is a much better place with her in it, that I am sure. Now that I'm thinking about it, that could have also been my title!


Have fun with this month's kit and I can't wait to see what you create!


Sunday, August 7, 2011

Up Close and Personal with Lan!!

Hi there, my favorite line is My Mind's Eye Hattie because it has so much texture. The chipboard pieces are so cute and fun. For the background blue, I added some faded jeans distress ink.


For an added embellishment, I crumpled and layered a flower. The yellow brad was from my stash and I added a bit of distress ink on it also because it was too bright of a yellow to start with.


And the buttons, oh my, you gotta love these wooden buttons! I decided to string them together with some baker's twine...like a horizontal hanging frame.


And the rest all came together for this sweet layout of my boys and their cousin. Can't wait to see what you create with this awesome kit.


Saturday, August 6, 2011

Up Close and Personal with Kim!

Hi Scrappers!!!!! I am so excited to bring to you the Doubleshot "Lime Twist" kit!!!!!! I am a huge fan of My Mind's Eye so when I laid my eyes on the "Lime Twist" papers, I was completely in love!!!!!! They scream Summer and fun, fun, fun,!!!!!! I knew I had the perfect pictures for this kit!

In this first layout I worked with the sketch for this month, so the design part was a breeze. The rest of the layout was easy-peasy!!!! I pop dotted the stickers and title for dimension and added another pinwheel flower to the layout and layered it with a sticker and a button.


Here is another layout I made with the kit. I loved the added baker's twine to the kit so much that I used some from my stash to hand stitch the circle on the page. I think it added a lot of interest to this page. What do you think?


Now, look at how much I have been able to stretch this kit....besides adding a piece of cardstock from my cardstock kit club, the rest is still from the Lime Twist kit. And.....look at the fab paper bow I made from Aphra's tutorial! I just love how sweet it looks on my card!!!!!

I hope you enjoy this kit as much as I did. Be sure and pull out your fun Summer-time pictures and get to scrappin!!!! Load them to the gallery so we can see what you created with the 'Lime Twist", DoubleShot kit!!!!!


Friday, August 5, 2011

Up Close and Personal with Melanie!!

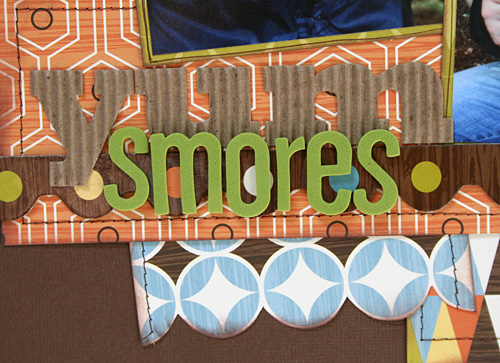
I really really really LOVED this month's kit! I used up almost my entire kit and am down to mostly scraps...yay! My favorite layout this month was " Yum Smores" with the American Crafts: Campy Trails line. I love Daddy and Son photos...they make my heart so warm and full!

American Crafts: Campy Trails


For my title, I layered my alphabet stickers to add a bit more dimension. I liked the bold patterns for this line so I cut around the circles to "show" them more. For you gals that don't like bold patterns, don't worry, the other side of the paper is very neutral. I also used my sewing machine on this layout...I love to sew too.


I loved the felt Details...to cute! I layered my cabin with some pattern paper cut outs to make a little cluster of fun.


To top my layout off, I used Jenny's banner tutorial from last month. I loved the wooden buttons...perfect for the ends of my banner.


Okay, I think I used the word love way to many times in this post. But I seriously did LOVE this entire kit!

I'll be sharing more of my Simple Stories mini later this month!

Thursday, August 4, 2011

Up Close and Personal with Jenny!

Hi everyone! Are you excited about this month's kit?!! So many goodies packed into one kit...love it! :)

One of my favorite lines from this month was the American Crafts "Campy Trails" line. I had these pictures from last year's vacation to a drive-through exotic wildlife ranch just sitting around, and when I saw the rustic/outdoorsy look to the Campy Trails line, I just knew these pictures were finally going to get scrapped.


One of the things I love to do with patterned papers is look for ways to cut out embellishments from the patterns. That's exactly what I did with the banner in the top right corner:


I cut out some of the triangles from the patterned paper and added some of the cute wooden buttons to make my banner.

I loved the patterned paper that had animals and pine trees all over it, but it was a little too busy to use the full sheet on my page. So, I cut out a couple of the little ovals, added a wooden button to them, inked the edges brown, and made little embellishments out of them too!


The next time you are looking to stretch your kit a little further but have realized that you have run out of embellishments, don't worry! Look no further than the patterns on your papers for your very own personal embellishments. All it takes is a little precise cutting, and you're good to go. ;)

Wednesday, August 3, 2011

Up Close and Personal with Sarah!

Happy August to all! Don't you just love the August Kits? They are fabulous!

Here are two layouts I created with some Basic Grey "Out of Print" in the Double Shot kit. The flowered paper was just screaming out to me to be cut up. So I fussy cut some flowers and popped them up with foam tape on both layouts. I thought the stripes were a little overpowering for my photos so I cut strips from it and used them above and below my photos to bring the focus on my photos.


I stamped some clouds onto the text paper and then cut those out too! The letter are from the embellishment kit and I couldn't resist using them on this layout. I just needed to outline them with a white pen to help them stand out.


I added the Pebbles flower from the kit to the middle of one of my cut out flowers to give it some more dimension. And of course I had to add some faux stitching!


Next time I will show what I did with the extra flowers I cut out, but didn't use.

Have fun with the August kits! I can't wait to see what you create!

Tuesday, August 2, 2011

NEW August Kit and Up Close and Personal with Aphra!!

It's August!!!! And that means a NEW FABULOUS kit and goodies in the store! Whoot! Whoot! Take a look... and the member pricing...WOW!

Flavors of the Month Kit $21.95


Double Shot Kit $15.00


Wowee, right? Like I said...just fabulous!! If you would like to become a member of The ScrapRoom, check out our website HERE. We would love to have ya! And stay tuned because we have TONS of inspiration for you this month here on the BLOG!

And speaking of inspiration! Aphra is up first with our new feature, Up Close and Personal! Here she is...

Hello scrappy peeps! Ready for another round of Up and Close and Personal posts? I'll be kicking it off with my favorite layout this month, a bright and happy summertime layout.

Happy


These Sweet Summertime papers by Little Yellow Bicycle are so bright and vibrant. LOVE them! The yellow piece has a tone-on-tone sunshine pattern on it. Perfect for scrapping some summertime shots.


How about that giant pinwheel, hun? That just screams summer to me. Stay tuned because I'll be posting a little tutorial on how to make it later in the month.


Another banner. I can't help it; I'm still loving them. This one, though, is a bit different because of the mix of shapes. My fellow design team member Jenny Moore did a fab tutorial on this type of banner HERE last month. Enjoy!


Alright then, thanks for stopping by. I'll see you later this month for a little DT Inspiration. See ya then!