Showing posts with label tutorial. Show all posts

Monday, February 24, 2014

Project Life Inspiration: Shaker Pocket Tutorial

For today's Project Life post, I thought that I would share a quick and easy tutorial for how I made the Polaroid shaker pocket for this February Days layout. It's the first one in the middle row on the left side. See it?
 

I used the contents of my February Project Life Kit, but here's a list of supplies just in case:  (8-10) American Crafts Tiny Burnished Hearts or other confetti pieces, (2) Jillibean Soup Kraft Mini Polaroid Frame Die Cuts (or cut two 3" by 4" frames out using your die cut machine), (1) 4" x 6" Acrylic Overlay, Solid Cardstock, Glue Dots, and tape runner.

Now for the steps for putting it all together. First, back each of the die cut words with a piece of coordinating cardstock. Next, cut the overlay so that it fits over the frame opening on each die cut and adhere it with glue dots.  Next place one die cut on your table face down. Place the wooden hearts (or other confetti pieces) on top of the acrylic overlay. Run a strip of tape runner all around the edge of the frame. Place your other die cut on top. Trim around the edges.


And voila! A trendy shaker pocket for your Project Life pages. Hope you liked today's tutorial!  See you soon.

Wednesday, April 10, 2013

Quilted Cards... & Envelopes, Too!

You know me... always looking for something to do with my scraps and trying to kill off a kit (or five)!  Well, this month I used up my April Doubleshot Kit scraps by making fun quilt-y cards.


I know a lot of scrappers out there are also quilters... or like me, used to be quilters and maybe some day will be again (come on, retirement!!!).  But now when I get the urge to get quiltin'... I grab my favorite quilt patterns and paper scraps instead.  Paper quilting is actually a lot easier than real-life quilting.  For one thing, the canvas is much much MUCH smaller.  And you don't have to worry about pesky seam allowances.  *fist pump*  Corners always match up - and if they don't... well, nothing a cleverly-placed embellishment can't fix!

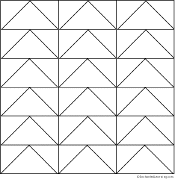
Let's get to it.  You'll need some cardstock, scraps, matching embellies, some quilt patterns... and those LilyBee tone-on-tone papers we've been getting as cardstock lately.  For this example, I'm going to use Flying Geese as my quilt pattern (one I love, but actually pretty much suck at getting the corners right in real life) and the Carta Bella Traditions kit from January 2013.
"Flying Geese" (search for quilt patterns online... you'll find tons!)
Cut a full sheet of cardstock in half and fold each piece in half.  These will be 6x6" cards.  Yes, I know they will cost $1.12 to mail because it's a square and a little heavy... but square mail is cool.  And still way cheaper than buying a card and still having to mail it!  And quilt squares are, well, square.
I'm doing one strip of the Flying Geese pattern.  I cut the dark patterned paper into a 2.5" wide strip.  Then, to get my "geese" shapes, I cut a 2.5x2.5" square and cut it into quarters.  No seam allowances = super easy paper quilting!  Just cut squares and off you go!
To make an envelope for a 6x6" card (with a little room to spare), cut those LilyBee papers to 10x10", score in 3.75" from each point, trim the little overlap area, and fold.  Easy peasy - especially if you have a Martha Stewart Score Board.  The instructions for this size envelope are printed right on it. 
As typical for me, I distressed the edges, laid on a bunch of machine stitching, and made some elaborate tags.  Do as much or as little as you like - your cards can be done your way!
A closer look:  I like my quilt-y cards to have a sewing "feel" to them.  So I like to add ric-rac, embroidery thread, buttons, and little safety pins.  Plus I like to attempt to try to use up at least a small part of my stash!  LOL
These cards are a fun way to use up your scraps and your stash... and they let you scratch that little quilting itch, too!  If you make some quilt-y cards, I'd love to see them - share them in the comments below!

- Theresa/Savi

Wednesday, August 8, 2012

Make Your Own Stick Pins & Flags (and a giveaway!)

Need just one more thing on your page but you don't know what?  Down to a few scraps and not much else?  Have some *other* crafty stuff hanging around?  Then maybe I can help!

Here are the flags and stick pins I made and used with the MME Indie Chic Citron collection this month:

Flags and stick pins turn out to be pretty easy to make with a few supplies that you may already have on hand.  And if you don't - no worries.  For less than $10 and a quick stop at a local hobby shop, you can have enough stuff to keep you (and maybe a lucky scrappy buddy) in flags and pins for a while.  In fact, I'll bet if you know a beader, you can trade a stack of handmade cards for everything you need.  Throw in some chocolate too, and she might let you walk away with some crystals! 

You'll need super glue, head pins 2" or longer, seed beads, some larger beads, spacers, and 1/2" strips of paper and/or banner stickers.  The flower print paper was just my reference for finding the right colors of larger beads out of my stash.  A word about beads:  Notice the bag of "bead soup"?  Those are just leftovers from other projects or things the kids had.  Most beaders I know have a bag of leftovers like this.  And would be glad to unload it... remember the chocolate!!!  Otherwise, you can pick up a cheap collection of beads at a craft store.  Cheap is perfect and grab bags are great!

I use fewer beads for flags.
Assembling the flags and stick pins are pretty straight-forward.  Put a few beads on the head pins.  If it looks good to you, then you've done it right!  Use the super glue to hold the bottom bead in place.  I like to put a little glue on the head pin between the last and second-to-last bead.  As I push the last bead in place, it runs into the glue and sticks into place.  For flags, just fold the paper or stickers around the pin, and trim the end.

Look familiar?  Yup, those ended up on a card!


Using head pins results in pins that won't poke you - or your page protectors.
And now about that giveaway... one randomly selected commenter will win the 6 stick pins shown directly above!  You have until the next post goes up to enter.  Good luck - and I hope you'll try making your own!

Theresa

Tuesday, July 10, 2012

Tuesday Tutorial: For Chevron Lovers AND Haters!

Love chevrons?  Please, take a moment and go drool over this post by Aphra about the chevron trend.  Then come back and get ready to make chevrons out of any double-sided paper you have!

Hate chevrons?  Then feel free to grab some chevron paper, a pair of scissors, and let loose a maniacal laugh - because we're going to deconstruct some chevrons and make them go away!

Love Those Chevrons!  (haters, you may skip this section)
Here's a card made with the Simple Stories Summer Fresh line... and some made-from-scratch chevrons:
 

To create your own, cut strips from any double-sided paper.  I used 1/4" strips, and chose paper with very different sides so that the chevron would "pop".  Using my (well-loved) cutting mat as a guide, I folded the paper every 1/2" on the diagonal:


I ran the strips through a Xyron so they'd stay in place as I sewed them down.  You wouldn't need to sew them, but I think you should use a stronger adhesive than the repositionable Xyron I used.  You can see the strips lifting before I ran them through my machine:

Trim off the ends and you are done.  Easy peasy!  (Now don't look at the next little tutorial... it just might break your heart.) 

Chevron Haters! (you know who you are...)
Here's a layout made with Simple Stories Summer Fresh and a deconstructed chunk of chevron paper:

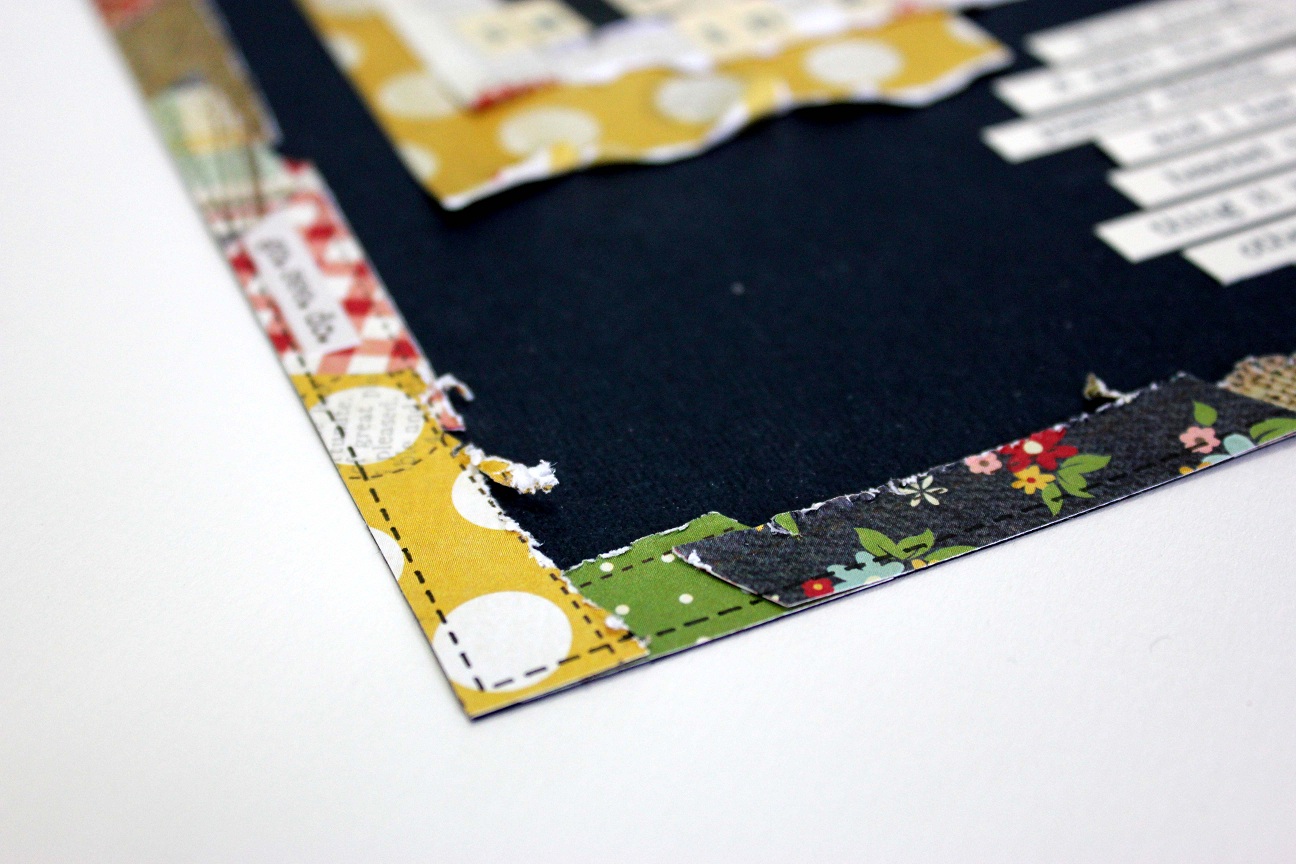
The border of this page started out as a chevron... just cut apart, roughed up, lined up, trimmed off, and doodled on.  Doesn't that make you happy thinking about it? 


My dog Grey chewed on the green piece when it fell off my table.  Apparently he's a hater...
From here, just trim the overlapping bits flush to the cardstock edge.  I chose to doodle a stitched line around the edges to match the details on the paper, but it isn't necessary.  Here's a close up of the final product:

So there you have it.  Whether you love them or hate them, we've got chevrons.  Might as well go have fun with them!

Theresa

Tuesday, June 19, 2012

Tuesday Tutorial: Bazzill Perfectly Pleated Strip Flower

This month's Embellishment Add-On included a 12" pleated newsprint paper strip by Bazzill. I just love it! So much, in fact, that I decided to create a card with it as the main embellishment.


Today, I thought I'd share with you how to create a flower out of your Bazzill Perfectly Pleated 12" Strip.  It is super easy, and really makes for a nice embellishment.


First, you will need to adhere the two ends of your strip together to create a circular band.  Like this.


Next, punch out a circle. Mine is 1 7/8" in diameter.  Cover the circle with lots of adhesive.  Fast drying liquid adhesive or a hot glue gun works best.  Then flatten the center of your band down onto your circle and place your punch on top of it until it dries and looks like this.


Add it to your card and top with a large Jillibean Soup chipboard acrylic button tied with a strip of ribbon.  This is also a great place for a couple of the stick pins from this month's kit.


I hope you enjoyed this tutorial!  Leave me a comment with a link to your project if you give it a try.  I'd love to see!

Tuesday, June 12, 2012

Tuesday Tutorial: Altered Frame

Hello everyone!

Jenny here to show you all how to make a cute little altered picture frame using the Basic Grey PB & J collection from the June 2012 kit.

I L.O.V.E. this collection because it can basically go with any kind of pictures. I used the majority of this part of the kit to make a couple of Disney themed pages, but I used the leftovers to create this altered picture frame.


I placed the frame with a couple of vases from IKEA that I already had, as well as a decorative ball that I already had..and voila! Instant home decor setting! This is now sitting on my fireplace mantle.

You want to know the best part???? It only cost me $1!!!! Here's what I did:

  1. I bought the plain wooden frame at JoAnn craft store in the $1 section.
  2. I painted the outside edges and the inside edges of my frame with white paint just to make it look more "finished."
  3. I used Mod Podge to cover the frame with the chevron patterned paper from the Basic Grey collection. (I used Mod Podge to glue the paper down onto the frame, and I also put a layer of Mod Podge on top of the paper to secure it.)
  4. I already had some yellow/gold felt on hand, so I used it to create the flower. You can find a great tutorial on how to make a flower like that here. I then hot glued a button to the middle of the flower and then hot glued the flower to the frame.
  5. I went to this blog and downloaded the FREE "Keep Calm" prints. They come in lots of colors (how cool is that?!), but I printed out the one in "sky" color.
  6. I placed the print into the frame, and it was complete! :)


My mind is already swimming with gift ideas and more home decor items! There are SO many great free printables out there...just Google what you're looking for, or search for free printables on Pinterest, and you will find tons. Using up kit leftovers to create these little inexpensive items is perfect for the budget, AND it helps you use up those leftover pieces that we all can't seem to part with. ;) I can't wait to make up some more of these for gifts!

Tuesday, May 22, 2012

Tuesday Tutorial: Paper Sunburst

Hi everyone!  Aphra here today to share a fun tutorial on how to create a paper sunburst like I did on this layout in the May gallery.

Hello Sunshine


I used a tutorial by Laura Vegas that I found HERE at her blog.  I thought I would summarize it here, so it would be readily available in case you'd like to give it a try.

Cut a piece of 12" x 12" paper to the size that you want your finished sunburst to be. Mine measures 4" x 12". Draw a circle where you want the sun to be.  And then draw radiating lines coming out from the circle.


Number the sections.  And then cut them apart.  Use the pieces as a pattern to cut your patterned paper. Number each of the patterned paper pieces as well.  


Put the pieces together on your layout like you would a puzzle.  Cut a circle and use foam adhesive to add to your finished layout.


I hope you enjoyed this tutorial and are able to create a sunburst of your own.  Happy scrapping!

Tuesday, May 15, 2012

Tuesday Tutorial: Spot Color

Hi everyone!  Theresa here today with a quick and easy photo tutorial.

I like to match my photos to my paper, so when I got the Amy Tan Sketchbook kit to work with, I went looking for photos with pink, blue-green, and black in them.  I found almost perfect photos:  pink and blue-green, but brown instead of black. 

Then I remembered a conversation that we recently had on the Message Board about using black & white photos - some of us convert difficult pictures to B&W so that color no longer becomes an issue.  Hmmm...  I needed some of the colors, but not all of them.  Then I remembered some scrappy friends with Photoshop being able to layer photos and remove areas where the color should be.  But that's a lot of work, and I'm lazy.  What if I did it manually?

So that's what I did.  I printed two sets of photos:  one set in color, and one set in B&W.  I cut out the area I wanted to be in color, layered it on my B&W photos - and it was perfect for what I needed.  Here's how the final product looked:


Then I started thinking of other conversations we've had on the Message Board about difficult photos... would this work for those?  I personally struggle with Christmas and Birthday photos.  I think it's because of the chaos, colors, and sometimes unfortunate backgrounds.  Like these Christmas photos of my boys years ago.  So darn cute, but there's a lot of other distracting stuff there - and a freaky huge hairy leg!  LOL!


So I did the same technique above... I printed the photos twice, one set in B&W, and one in color.  Then I cut each kid out of the color photo.


You know what?  It's low tech and fast - and I think it works great!  Shoot.  Now I really want to redo the layout that these pictures are on!


Try this technique on your next batch of photos, whether they are difficult photos or special ones that deserve some focus.  Link up your black & white & color photo in the comments below - I'd love to see what you come up with!

Monday, April 9, 2012

DT Inspiration: Layered Flowers

Hello my scrappy friends!  Today I want to share my quick, easy method for creating the layered flowers on this card for the April gallery.

Wonderful Card


Each flower consists of a 2", 1.5", and 1" circle that has been distressed and then stacked.  I used a dimensional glue dot to layer them together.  It helps add a little more, well, dimension.  Here's an overhead view.


For the leaves, I just cut them out free form and then trimmed until I liked the shape.  The edges are chalked for some definition.  And then for the finishing touch, a button with a twine bow tied onto the back side.  Another glue dot and you're finished.  

Easy, right?  Here are some more variations on this same idea.


Here, instead of using my circle cutter, I cut the circles free form.  The curvier, the better.  These are chalked instead of distressed.  Oh, and only two layers.  More buttons and bows.


This one is the same basic idea.  I cut four flowers on my Cricut, each one a quarter-inch smaller in size.  Instead of a button, though, I used a cabochon.


For this one, I used three different sized scalloped circle punches, a fabric flower, a brad, twine bow, and an itty bitty tag for the sentiment.  To give the flower a lot of texture, I crumpled each circle before layering them together.


Ok, last one, promise.  Anyhoo, for this one, I cut a 1" x 12" piece of paper, pleated it (by scrunching it), and then adhered it to the back of two jute circles.  In addition to the button and leaves, I added a couple of stick pins with a tag.

As you can see, you can create many different flowers by just varying the size and style of your circles, centers, and embellishments.  Hope you'll give this a try!