Well, look at it anyway. Take a good look - it might just inspire you to try something different than you had planned!
The August Doubleshot kit had a few elements in it that really grabbed me.
Now, I have a weakness... call it a fondness... for office supplies. And when I saw this rolodex card chipboard sticker in the American Crafts Mayberry kit, my whole layout just spun out from this:
I cut paper to look like a file folder and added in paper clips, staples, tabs, and stacks of paper - I wanted this page to look like a work in progress, a pile of papers and pictures that had been tucked away in a folder and was just rediscovered.
When I was down to just scraps left of Fancy Pants Wonderful Day, I wanted to make a few cards. And since this kit was full of arrows of all kinds... I decided to just go with the arrow theme and had a lot of fun with these gift cards! The base cut is a Silhouette pattern and it didn't take much to finish them off. A heart, some twine, and a few more arrows and I was done in an instant.
Sometimes it really is easier and faster to get more pages (and cards!) done if you don't think about it too hard. Just listen to your kit. You'll love where you end up!
- Theresa/Savi
Showing posts with label DT Inspiration. Show all posts
Monday, August 19, 2013
Wednesday, August 14, 2013
Melanie Uses That Ruler!
Wow...it's almost back to school time! One school supply that I use
for scrapbooking is the ruler. I love my clear 12 inch ruler (having it
clear is a must for me). I use it for aligning photos, papers, and
definitely my alphas. Here's how I like to make my titles....
2. Place ruler over your layout. This allows you the flexibility of arranging your title without actually adhering it yet.
3. Once you have it where you like it...simply press down on the top of your alphabet and then gently remove your ruler. Yay...it's straight and exactly where you want it.
School supplies are for grown ups too :)
1. Align alphabet stickers along top edge of ruler.
2. Place ruler over your layout. This allows you the flexibility of arranging your title without actually adhering it yet.
3. Once you have it where you like it...simply press down on the top of your alphabet and then gently remove your ruler. Yay...it's straight and exactly where you want it.
School supplies are for grown ups too :)
- Melanie
Wednesday, July 24, 2013
Photo-less Scrapping
Sometimes I have events to scrap about but no pictures. And
sometimes I have paper I want to use but nothing matches (yes, I'm one
of those matchy-matchy scrappers *wink*). The Bella Blvd kit in the
July Doubleshot was like that for me. Around here, if I take a picture
of anything, it's either orange, safety yellow, brown, or pink... not so
much red, white, or blue! And I did consider taking some of those
photos and turning them black & white, but for me, colors are part
of the story. So what to do? Well... back to the first thought: scrap
an event that doesn't have pictures!
On 10/10/10, one of the topics on the Message Board was to list 10 things that defined your life at the time. So I did... and I snapped a screen shot of it and saved it for just the right page.
Oh gosh... only 32 posts! Awwww, I was just a baby MB'er. LOL
And here's what I did with this and the Bella kit:
So the next time you have paper you want to use but nothing matches... or you want to scrap an event that's important to you but there's no pictures... Grab yourself a ScrapRoom kit and get to work! Sure, a picture may be worth a thousand words, but I'll argue that any memory will trigger about that many words, too.
Want to see more examples? Check out some more of my pages (you can always click on them to see them bigger). I love looking at these now. And yes, the words alone trigger enough memories to make me smile!
I'd love to see any photo-less layouts you come up with; share them below!
- Theresa/Savi
On 10/10/10, one of the topics on the Message Board was to list 10 things that defined your life at the time. So I did... and I snapped a screen shot of it and saved it for just the right page.
Oh gosh... only 32 posts! Awwww, I was just a baby MB'er. LOL
And here's what I did with this and the Bella kit:
So the next time you have paper you want to use but nothing matches... or you want to scrap an event that's important to you but there's no pictures... Grab yourself a ScrapRoom kit and get to work! Sure, a picture may be worth a thousand words, but I'll argue that any memory will trigger about that many words, too.
Want to see more examples? Check out some more of my pages (you can always click on them to see them bigger). I love looking at these now. And yes, the words alone trigger enough memories to make me smile!
I'd love to see any photo-less layouts you come up with; share them below!
- Theresa/Savi
Monday, June 17, 2013
Use Up Those Scraps!
Seeing Aphra's "Project Disney" layouts really inspired me to take
another look at some leftover Disney World photos I've had in a box
since 2009. I've scrapped lots of Disney pages from that trip, but I
still have a lot of "extra" photos that are too special for me to just
throw out. It might be the look on someone's face in the picture....a
little detail that captures a special moment...you know what I'm talking
about. I printed almost every single Disney photo because each one,
even though it may be similar to another photo, helps capture something
special that I didn't want to forget. I'm sentimental like that. ;)
Anyway, scrapping every single Disney photo that I took is probably not 100% possible, but using the "Project Disney" style of layout certainly helps get those photos into the album and the stories told! So....here's what I did:
Using my leftovers from the June kit, I cut papers down to the sizes I needed to fill each pocket, added a few small embellishments or Disney stickers that I've had forever, and added photos. Once my journaling was written, I had 8 Disney photos scrapped and documented! It was SO easy and SO fast! And, it's the perfect way to kill some TSR kits.
Pull out a couple of divided page protectors, some leftover TSR kits, and see what you can create. Every photo scrapped is a memory documented forever. That's really what it's all about, right? :)
- Jenny
Anyway, scrapping every single Disney photo that I took is probably not 100% possible, but using the "Project Disney" style of layout certainly helps get those photos into the album and the stories told! So....here's what I did:
Using my leftovers from the June kit, I cut papers down to the sizes I needed to fill each pocket, added a few small embellishments or Disney stickers that I've had forever, and added photos. Once my journaling was written, I had 8 Disney photos scrapped and documented! It was SO easy and SO fast! And, it's the perfect way to kill some TSR kits.
Pull out a couple of divided page protectors, some leftover TSR kits, and see what you can create. Every photo scrapped is a memory documented forever. That's really what it's all about, right? :)
- Jenny
Wednesday, June 12, 2013
Tips & Tricks: WRMK For The Record
I learned a few things while putting this recipe card layout together, so I thought I'd share!
(Wait, have you seen our recipe cards? You can access cutting instructions and photo sizes used - getting more pages done doesn't get any easier than that!)
The first thing I learned is that 12x12" paper doesn't fit in my printer. I know, right???? LOL I'm so used to doing 8.5x11" pages that printing my journaling is just one of those things I don't think about. I loved the WRMK just as is, so I didn't want to cut it up just to make it easier to work with. Except... I *could* cut it up if I was careful!
The other thing I learned is that sometimes things happen that you *can't* control. GASP! I know, right???? My pleated cardstock strip is an example of that.
I intended to just sew one nice straight line of stitches through the center of the strip. Well, I got it, sort of, but my machine was making this horrible noise and it was eating thread like crazy. And I was a little annoyed. I got a bunch of beautiful variegated silky thread for Christmas and it was just whizzing off the spool! I turned over the paper and discovered that the tension was really messed up and made this amazing loopy texture. Hmmmm... that would look really cool on TOP of my page... So I turned the page over, crossed my fingers, and sewed near my first sewn line.
And it worked! And I have no idea how to do this again on purpose. But I'm glad I ran with it - this ended up being one of my favorite pages of all-time.
Oh, and the photos? I don't have Instagram (maybe I'm one of the last people on the planet?) so I downloaded a free app named Pixlr-o-matic onto my desktop. Tons of fun filters and effects! And you can turn your rectangular photos square, too!
Hope you are inspired to try something new - or to turn a stumbling block into a jumping off point. You may just love what happens next. *big love*
- Theresa/Savi
(Wait, have you seen our recipe cards? You can access cutting instructions and photo sizes used - getting more pages done doesn't get any easier than that!)
The first thing I learned is that 12x12" paper doesn't fit in my printer. I know, right???? LOL I'm so used to doing 8.5x11" pages that printing my journaling is just one of those things I don't think about. I loved the WRMK just as is, so I didn't want to cut it up just to make it easier to work with. Except... I *could* cut it up if I was careful!
| I journaled and printed onto some plain printer paper. Next step is to tape the good paper on top - I use a lightbox, but a window works really well, too! |
| I sent the good paper (taped onto the printer paper) back through the printer and taped it all back together. You can see the pencil lines really helped me line things up! |
| Back in place. You can't tell, especially once it gets put into a page protector. |
I intended to just sew one nice straight line of stitches through the center of the strip. Well, I got it, sort of, but my machine was making this horrible noise and it was eating thread like crazy. And I was a little annoyed. I got a bunch of beautiful variegated silky thread for Christmas and it was just whizzing off the spool! I turned over the paper and discovered that the tension was really messed up and made this amazing loopy texture. Hmmmm... that would look really cool on TOP of my page... So I turned the page over, crossed my fingers, and sewed near my first sewn line.
And it worked! And I have no idea how to do this again on purpose. But I'm glad I ran with it - this ended up being one of my favorite pages of all-time.
Oh, and the photos? I don't have Instagram (maybe I'm one of the last people on the planet?) so I downloaded a free app named Pixlr-o-matic onto my desktop. Tons of fun filters and effects! And you can turn your rectangular photos square, too!
Hope you are inspired to try something new - or to turn a stumbling block into a jumping off point. You may just love what happens next. *big love*
- Theresa/Savi
Friday, June 7, 2013
Hey, Dude!
So... here's a public service announcement: It's Father's Day in the U.S. in a few weekends.
Some of you have just mentally thanked me (you are welcome). *grin* Some of you have shrugged. We don't get to choose our dads, do we? And some are sad. (I'm sorry.) *sniffles*
But you know what? All those feelings and responses... they all have a story behind them. And that story... have you recorded it? If not for your family, how about for yourself? That's why we scrap and make cards, right? Right! And I've discovered that I've done a lot of that over the years. Coolness. Man, the memories as I went through my pages! [Feel free to click the images and make them larger... warning, some of the journaling gets mushy! LOL]
So if you want, make a card for your dad. Or maybe a layout about what you've learned from the number one man in your life!
Not wanting to go there? What about a guy in your life that deserves some props? Yeah, you're thinking of someone right now that you love and adore. Husband? Grandpa? Brother? Guy friend? Turn your scrappy awesomeness towards documenting those relationships!
Got a case of the "remember when's" and sitting and wishing for the days that used to be? Then scrap those, too. People may change, but memories don't. If you want to celebrate what you had, by all means - do it. No one said scrapping is only about the here and now!
So, just like every other holiday out there, Father's Day comes with emotions. Embrace them, and turn it into something that works for YOU. Remember, the scrapbook police and card crazies are not coming over. No rules, just life. And it's all good. *smiles*
Happy scrappin'!
- Theresa/Savi
Some of you have just mentally thanked me (you are welcome). *grin* Some of you have shrugged. We don't get to choose our dads, do we? And some are sad. (I'm sorry.) *sniffles*
But you know what? All those feelings and responses... they all have a story behind them. And that story... have you recorded it? If not for your family, how about for yourself? That's why we scrap and make cards, right? Right! And I've discovered that I've done a lot of that over the years. Coolness. Man, the memories as I went through my pages! [Feel free to click the images and make them larger... warning, some of the journaling gets mushy! LOL]
So if you want, make a card for your dad. Or maybe a layout about what you've learned from the number one man in your life!
Not wanting to go there? What about a guy in your life that deserves some props? Yeah, you're thinking of someone right now that you love and adore. Husband? Grandpa? Brother? Guy friend? Turn your scrappy awesomeness towards documenting those relationships!
Got a case of the "remember when's" and sitting and wishing for the days that used to be? Then scrap those, too. People may change, but memories don't. If you want to celebrate what you had, by all means - do it. No one said scrapping is only about the here and now!
So, just like every other holiday out there, Father's Day comes with emotions. Embrace them, and turn it into something that works for YOU. Remember, the scrapbook police and card crazies are not coming over. No rules, just life. And it's all good. *smiles*
Happy scrappin'!
- Theresa/Savi
Wednesday, May 15, 2013
Making Cards with a Layout Sketch
Did you see the great sketch Tammy created for National Scrapbook
Day??? Even though it was designed for layouts...it is a perfect sketch
for cards too. I used the left over bits from my May kit and made 3
Mother's Day Cards using the sketch. Now don't fret that it's past
Mother's Day because you can make Birthday, Hello, or Thank You cards
(or be really prepared for next year with Mother's Day cards) using your
May kit and the NSD sketch.
Awesome NSD sketch:
Try using a layout sketch for next card!
- Melanie
Awesome NSD sketch:
My three cards based on the sketch:
- Melanie
Monday, May 13, 2013
2 pages, 9 photos, and All Scraps!
If you're like me, you have lots of bits and pieces left over from
TSR kits. Sometimes I'll have a few embellishments and a couple of
scraps of patterned papers left over that I just have to keep because
they're too good to let go of.
So what do you do?
I've shared before how I love using the divided page protectors that Tammy offers in the TSR store, and these are a PERFECT way to use up leftover kit pieces!
I used leftover bits and pieces from a previous Christmas kit and was able to get 9 Christmas photos scrapped:
Don't throw out those scraps! Give them one more look and see what you can make out of them! I certainly didn't think I had enough of this kit left to make TWO pages, but with the help of the divided page protectors...I did! :)
- Jenny
So what do you do?
I've shared before how I love using the divided page protectors that Tammy offers in the TSR store, and these are a PERFECT way to use up leftover kit pieces!
I used leftover bits and pieces from a previous Christmas kit and was able to get 9 Christmas photos scrapped:
Don't throw out those scraps! Give them one more look and see what you can make out of them! I certainly didn't think I had enough of this kit left to make TWO pages, but with the help of the divided page protectors...I did! :)
- Jenny
Monday, April 15, 2013
Hidden Embellishments!
Hey
everyone! I've got a quick tip for finding some fun "hidden"
embellishments from your Elle's Studio part of the kit this month. At
the bottom of your patterned papers, you'll find these barcode strips
that have the name of the manufacturer and paper information:
But don't throw them away after you trim them off! If you flip them over, you'll find these little hidden gems:
The end result:
Don't forget to look on the backs of those barcode strips! You just may find some little hidden treasures for your pages there! ;)
- Jenny
Friday, April 12, 2013
Extra Embellishments?
What do you do with your
extra embellishments from each month's kit???? Do you use every last
one or maybe save a few for the "perfect" layout :) ????
I like to use most of mine because I know TSR will have more fabulous embellishments the next month. BUT there are a few I dohoard save for future projects.
I like to keep my saved embellishments in Making Memories plastic mason jars. I keep them in the cute little bags and just toss them in. I love how it is clear so I can see what I need. You can tell I am saving my wooden elements and enamel dots (LOVE them)...they are a perfect touch to add to many projects!
When I was creating an Anniversary card for my grandparents...I knew the cute wood veneer birds (Sept 2012 kit) would be perfect for the two love birds!
I like to use most of mine because I know TSR will have more fabulous embellishments the next month. BUT there are a few I do
I like to keep my saved embellishments in Making Memories plastic mason jars. I keep them in the cute little bags and just toss them in. I love how it is clear so I can see what I need. You can tell I am saving my wooden elements and enamel dots (LOVE them)...they are a perfect touch to add to many projects!
When I was creating an Anniversary card for my grandparents...I knew the cute wood veneer birds (Sept 2012 kit) would be perfect for the two love birds!
If you are a hoarder saver like me...don't forget to actually use those treasured embellishments!
- Melanie
Wednesday, April 10, 2013
Quilted Cards... & Envelopes, Too!
You know me... always looking for something to do with my scraps and trying to kill off a kit (or five)! Well, this month I used up my April Doubleshot Kit scraps by making fun quilt-y cards.
I know a lot of scrappers out there are also quilters... or like me, used to be quilters and maybe some day will be again (come on, retirement!!!). But now when I get the urge to get quiltin'... I grab my favorite quilt patterns and paper scraps instead. Paper quilting is actually a lot easier than real-life quilting. For one thing, the canvas is much much MUCH smaller. And you don't have to worry about pesky seam allowances. *fist pump* Corners always match up - and if they don't... well, nothing a cleverly-placed embellishment can't fix!
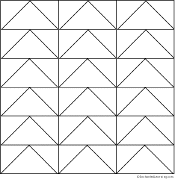
Let's get to it. You'll need some cardstock, scraps, matching embellies, some quilt patterns... and those LilyBee tone-on-tone papers we've been getting as cardstock lately. For this example, I'm going to use Flying Geese as my quilt pattern (one I love, but actually pretty much suck at getting the corners right in real life) and the Carta Bella Traditions kit from January 2013.
I know a lot of scrappers out there are also quilters... or like me, used to be quilters and maybe some day will be again (come on, retirement!!!). But now when I get the urge to get quiltin'... I grab my favorite quilt patterns and paper scraps instead. Paper quilting is actually a lot easier than real-life quilting. For one thing, the canvas is much much MUCH smaller. And you don't have to worry about pesky seam allowances. *fist pump* Corners always match up - and if they don't... well, nothing a cleverly-placed embellishment can't fix!
Let's get to it. You'll need some cardstock, scraps, matching embellies, some quilt patterns... and those LilyBee tone-on-tone papers we've been getting as cardstock lately. For this example, I'm going to use Flying Geese as my quilt pattern (one I love, but actually pretty much suck at getting the corners right in real life) and the Carta Bella Traditions kit from January 2013.
| "Flying Geese" (search for quilt patterns online... you'll find tons!) |
| As typical for me, I distressed the edges, laid on a bunch of machine stitching, and made some elaborate tags. Do as much or as little as you like - your cards can be done your way! |
These cards are a fun way to use up your scraps and your stash... and they let you scratch that little quilting itch, too! If you make some quilt-y cards, I'd love to see them - share them in the comments below!
- Theresa/Savi
Subscribe to:
Posts (Atom)