Showing posts with label February Kit. Show all posts

Friday, February 22, 2013

Wood Veneer Embellishments with Melanie

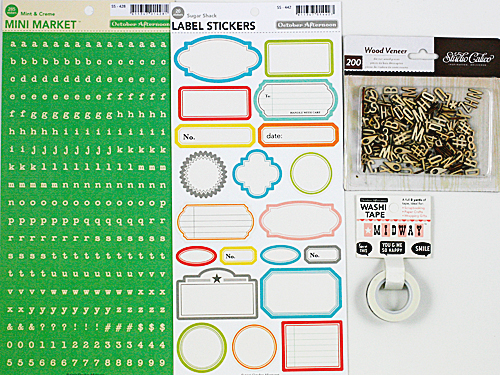
I am loving the wood veneer pieces that have been in our kits the past few months...people, trees, arrows, hearts, and an alphabet this month!

February Embellishment kit

They are the perfect embellishment! I usually keep the natural wood look, but you can use your ink pads or misting sprays to add color. I have found Mini Glue Dots to be the easiest way to adhere them...no mess and they stick great!

Here are little close ups of the wood veneers I used this month (yes, I did save hearts/arrows from a previous kit...sometimes I do use my hoarded embellishments :) )


Be sure to use your wood veneer embellishments on your next layout...or you can send them to me...ha ha ha :)

Melanie

Friday, February 15, 2013

Project Life: Weeks 7 & 8

For my 2012 Project Life album, Week 7 corresponds to Valentine's Day.  I chose the American Crafts XO kit since there was a lot of black and red in my photos.  It turned out to work very well.  (Click on photos to enlarge.)

Week 7


Since the paper in this kit is SO cute, I decided to keep my title, journaling, and filler cards simple.  For this one, I used a strip of 2.5" x 6" embossed cardstock.  The word February was cut with my Silhouette from black cardstock, but you could just as easily use some stickers from your stash.  The heart was punched from the back of one of the papers.  I stamped the date on a small scrap of red and then notched the ends.


Another simple insert.  I cut a piece of 2" x 4" paper and layered it with a border punched strip on top of the back side of one of the papers.  Add a couple of the super cute layered stickers and some typed journaling and done.


Ok, this one is my favorite!!!  I had a bunch of my kids' Valentines from their classmates to include.  Originally, I was going to place them all in the pockets but they were all different sizes and orientations.  My fix?  To create a pocket.  I cut a 2" x 4" piece and layered it over a 4" x 6" piece.  I used Red Line tape on the bottom and sides to keep it in place.  Then, I added a couple of embellishments.  The whole pocket along with Valentine cards easily fits into the page protector.  My kids were SUPER excited.


For this next insert, I used the Midway Washi Tape from the Embellishment Add-On to tape down the card that came with my flowers from my husband for Valentine's Day.  So excited that I saved that!  The only other embellishment that I used are the Studio Calico wooden people from several kits ago.  Their size is just perfect for Project Life!


This month's Stamp Set is too cute!!!  And just perfect for my Valentine spread.  I decided to stamp the images in White Staz On ink directly onto my photos.  I was really nervous, but it turned out to be easy.


Here's the last two filler cards.  Nothing but patterned paper and a cute heart sticker.


For Project Life: Week Eight I chose the Pebbles Family Ties line.  The bright colors and floral patterns were just perfect for my outdoor photos.  (Click on pictures to enlarge.)

Week Eight


My title block is pretty simple this week.  I added some Thickers from my stash and a circle label sticker that came with the kit.  It just thrills me to get to use up some of my Thickers stash!


For one of my 3x4 slots, I printed out a screen shot of one of my husband's super sweet texts.  Such a great memory and so easy to include.  


The Pebbles Chips are so cute without being too bulky.  I added several of them to the 3x4 filler cards.  For the My Brother Is card, I used the OA mini alphabet stickers to list some characteristics of the boys.  The yellow and white polka dot card was a freebie that I found at Pinterest.  You can find tons of fun downloads for Project Life pinned there.  If you'd like to print one out, you can find it HERE.


For this week's journaling, I created a Week In Review card.  Rather than journal about each specific event, I just summarized the entire week on the 4x6 Pebbles card that came in the kit.  This made the layout even quicker to put together.


I'll be back soon with some more PL posts.  There are tips, tricks, tutorials, and more freebies.  If there's anything you'd like to see in upcoming Project Life posts, leave me a comment.  I'd love to hear from ya!

- Aphra

Friday, February 8, 2013

We *heart* Hearts!

V-day... it's coming... and whether you choose to make it a big deal or just keep it on the down-low, a little Valentine's Day card or project is never out of place.  While you'll probably have your kits before the 14th, you can take any of these ideas and combine them with any paper you have with fantastic results.  All you need to do is add a little heart to it.  *giggle*

Melanie used a tag, a doily, and some twine... Perfect.  Even if you don't have this exact print, you can get the same look with other large graphics or diecuts + an added heart...
... like what Beth did here.  A horse + a heart = awwwwwwww! 
A card can be a great way to use up those leftover embellishments, too.  I used this large photo frame (with hearts!) as a base for some extra bits.  Your sweetie doesn't have to know they got the leftovers.  *wink*
Beth used some kraft hearts around a fussy-cut heart on this layout - and I bet you could make a card or a little love note just like this, too.
Not into any of that mushy love stuff?  No one said a card for your sweetie had to be all pink and girly.  Jenny adds a little red heart to this card... just another way to say "P.S.  I love you."
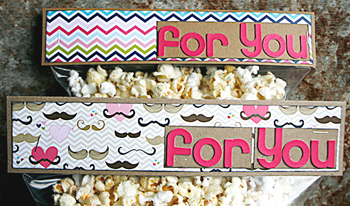
Try not to stare at the chocolate... and look at the cutest little card that Melanie made.  Quick and simple, but wonderful as a treat bag topper or tucked as-is into a lunchbox or briefcase.
And speaking of treat bag toppers... Tammy made these cuties with strips of fun paper and a set of bright alphas.  Easy peasy!
Jenny used this fun printed tag, too - and I love the different look she gets just by tilting it a little. And again, if you don't have this particular print, don't worry.  Make a tag shape and add...
... hearts and ink like Beth did, or...
... punched shapes and banners like I did - and then sew them down for extra texture! 
Next time you need some inspiration, head over to our Gallery.  Whether you look at our layouts, cards, or projects, you'll always find something to spark your mojo.  Need to make a page or just fill a little corner?  We've got you covered.  Just take what inspires you and add a little heart.  *love*

- Theresa/Savi

Wednesday, February 6, 2013

Project Life: Weeks 5 & 6

Hi everyone, I'm back with my first two weeks of Project Life for February.  For Week 5's spread, I chose the Crate Paper Fourteen kit.  It made for quite a colorful spread.

Week 5

Left Side and Front of Insert
This week I had a TON of pictures, so I decided to use an insert.  The left and right pages are traditional Becky Higgins Design A page protectors, and the insert is a 10" x 12" Design G.  
Back of Insert and Right Side
One reason I chose this insert is because it allowed me to use two 4" x 6" vertical photos of each of my kiddos with their grandparents.
The title card is pretty simple.  A couple of pieces of patterned paper topped with two die cuts from my Silhouette.  
To add the date to my layout, I cut this Memories image from my Silhouette.  I love that the patterned paper peeks through.  The cardstock all came in my kit.  I was even able to print my journaling onto the cardstock and then trim it down into a lithe banner shape.  
For my filler cards, I added more journaling strips attached with the Tim Holtz Tiny Attacher (an awesome addition to your Project Life supplies) and October Afternoon Label Stickers and some AC Kraft Heart Stickers.  I love that it doesn't take much time or many supplies to embellish the small 3" x 4" cards.

And finally, I added a cropped picture to the American Crafts Die Cut frame and embellished it with some October Afternoon Mini Market Alpha stickers.  Quick, easy, but SO cute!  
This week's spread includes nineteen photos.  Nineteen!  And . . . the layout is IN the album, not sitting on a shelf waiting to be put away.  And . . . I still have plenty of supplies left to do another spread or even create a traditional layout if I like.  

Week 6

For my Week 6 spread, I decided to mix it up a little by using two of the February kits:  Crate Paper Fourteen and American Crafts Darling Dear.  I based my selections on the colors in the pictures.  
With Insert
Without Insert
Again this week, I used an insert since I had sooooo many pictures.  This time, however, the insert is half of a Becky Higgins Design E page protector.  I love that all these pocket page protectors are seamed, so you can just trim then wherever you need to.  

Back of Insert
Becky Higgins' Design E page protectors have four 6" x 6" openings.  I filled two of those openings with 6" x 6" collages that I created using an iPhone app and then printed at Persnickety Prints.  You can learn more about these prints HERE.  I filled the other two openings with mini layout, one with paper strips and a card from the American Crafts paper and one with a 4" x 6" photo and paper border. The soccer ball was cut with my Silhouette.
For my title card, used patterned paper and another 3x3 card from the American Crafts paper.  The Studio Calico Wood Veneer Alphabet pieces are perfect for adding the week.  For one of the filler cards, I used an October Afternoon label sticker and one of the American Crafts chipboard hearts.  None of these embellishments is very thick, so they work very well in the pocket page protectors.
For this week's journaling, I created a Week In Review card.  It was so easy to type up the journaling and cut it out in strips.  And how cute are the Wood Veneers Alphabet pieces to label this card?
You wanna know my favorite part of this spread, though?  I got 16 photos into an album in about an hour using the contents of one of my TSR kits.  I am definitely getting more pages done!

- Aphra

Does this get you geared up for Project Life or what?  I am totally loving how Aphra is making the TSR kits work for Project Life... and now there's an even easier way to incorporate TSR kits into your pocket pages:  check out the new TSR Project Life Add-On Kit - coming soon!

Monday, February 4, 2013

February Sketch... and Our Winners!

Let me tell you... I love sketches.  And this month has to be one of my favorites.  That big title and teeny picture are a little different than what's normally in my scrapbooks, so maybe that's what made this sketch so much fun.  To me, it felt fresh and new and unique.  And what's not to love about that?
February Sketch by Tammy Harp
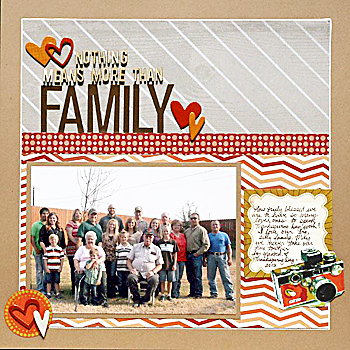
"Nothing Means More Than Family" by Jennifer Moore
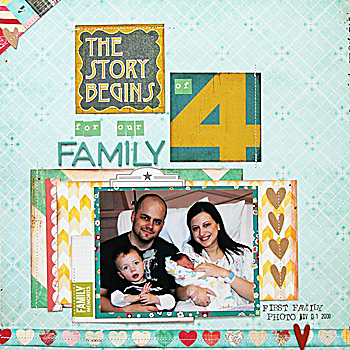
"The Story Begins For Our Family of 4" by Melanie Call
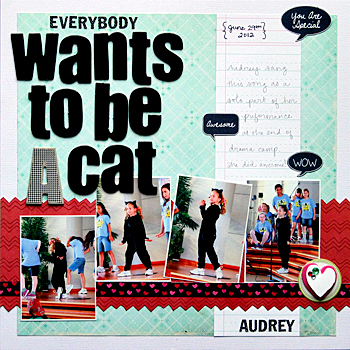
"Everybody Wants to be a Cat" by Brenda Carpenter
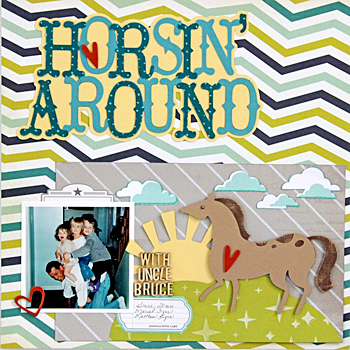
"Horsin' Around" by Beth Hallgren
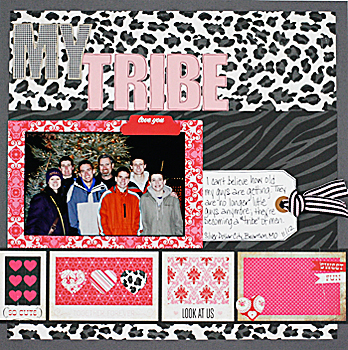
"My Tribe" by Tammy Harp
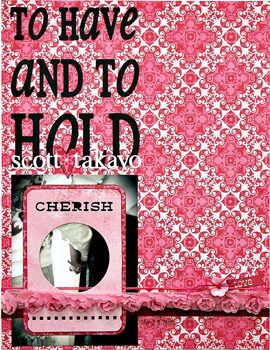
"To Have and To Hold" by Theresa Sovacool
It's really a fun sketch - give it a try for a chance to win a $10 gift certificate to The ScrapRoom Store.  Just link up your take on our sketch in the comments below. 

And speaking of The ScrapRoom Store, we have a few lucky winners again this month!

The January Sketch Challenge winner was randomly chosen to be Julie E with this breath-taking layout.  I love how she beautifully captured the airy softness of the dance costumes with this watercolor print paper, cloud washi, and ribbon.  And note the very clever restructuring of the BasicGrey paper from a 12x12 print to letter size!  Congratulations, Julie E!
"My Angel" by Julie E
The January Got Scraps Challenge winner was randomly chosen to be April with this darling layout.  While I do think the ink, touches of blue, and the journaling (oh, gosh *tears*) are wonderful, my favorite part is that simple yet perfect scrappy flower.  Congratulations, April!
"Our Sweet Baby" by April
scrappy flower detail *love*
Congratulations, ladies!  Please email Tammy at admin@scrap-room.com with your real name, address, and the name of the contest you won.  She'll get your prizes to you right away.  Happy shopping!  Don't forget to link up your sketch layout for your chance to win a shopping spree next month.  Good luck, and have fun with it!

- Theresa/Savi