Thursday, February 28, 2013

Sneak Peek #6: Echo Park Paper Photo Freedom (FOTM) & Project Life!

"Project Life Week 9" by Aphra Bolyer
"The "Volume 1" Photo Freedom collection is a collection full of essential title and journaling cards, patterned paper, stickers, and elements. Designed to stand on its own or to mix and match with other Echo Park Paper collections, you can now customize your designs to fit your style." -- Echo Park Paper Blog

Wednesday, February 27, 2013

Sneak Peek #5: My Mind's Eye Collectable (FOTM)

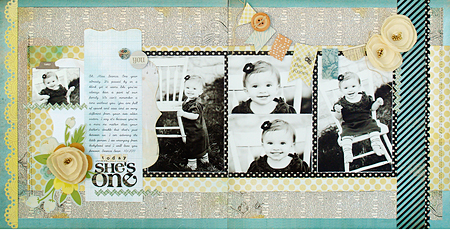
"Seven Months" by Melanie Call
"Fresh, joyful, and vibrant, these products will have you feeling happy! Comprised of oranges,blues,greens, and yellows...this color scheme is perfect for any project." -- MME Blog

Tuesday, February 26, 2013

Sneak Peek #4: American Crafts My Girl (DS)

"Skipbo" by Tammy Harp
"Sugar and spice and everything nice is just the beginning of My Girl. A palette of pinks, yellows, light blue, and gray create the adorable backdrop for handwritten type and doodles of flowers, butterflies, strawberries, and speech bubbles. My Girl is a precious collection for young ladies of any age." -- American Crafts Studio Blog

Monday, February 25, 2013

Sneak Peek #3: Little Yellow Bicycle Just Because (FOTM)

"Just Be You" by Jennifer Moore
"This beautiful collection of patterned papers and whimsical embellishments will help capture those special moments, whether it's a bike ride through the park or catching up over coffee or tea. Celebrate your everyday moments with friends . . . Just Because!" -- Little Yellow Bicycle

Sunday, February 24, 2013

Sneak Peek #2: American Crafts Dear Lizzy Lucky Charm (FOTM)

"You Make My Heart Sing" by Melanie Call
"Featuring an endearing assortment of charm bracelet icons - flowers, horses, hot air balloons, hearts, and arrows - Dear Lizzy Lucky Charm is a dreamland of color and patterns. Sweet pinks, aqua, yellow, red-orange and cream are grounded with a fun navy blue that make this collection charming. Lucky you." -- American Crafts Studio Blog

Saturday, February 23, 2013

Sneak Peek #1: Elle's Studio Day to Day (DS)

Yeah, sneaks are earlier this month... don't you just love February?  *big smiles*

"Mama Said" by Theresa Sovacool
"We are in love with this collection-- the blues, yellows, and kraft will brighten your every day and special scrapbooking projects." -- Elle's Studio Blog

Friday, February 22, 2013

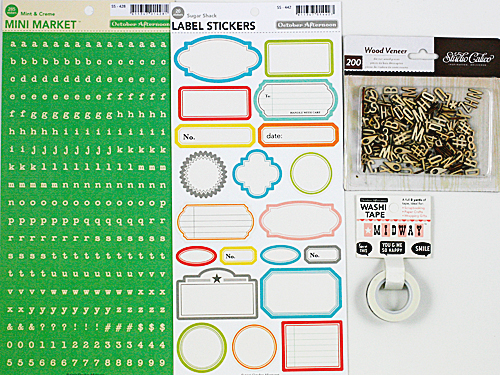
Wood Veneer Embellishments with Melanie

I am loving the wood veneer pieces that have been in our kits the past few months...people, trees, arrows, hearts, and an alphabet this month!

February Embellishment kit

They are the perfect embellishment! I usually keep the natural wood look, but you can use your ink pads or misting sprays to add color. I have found Mini Glue Dots to be the easiest way to adhere them...no mess and they stick great!

Here are little close ups of the wood veneers I used this month (yes, I did save hearts/arrows from a previous kit...sometimes I do use my hoarded embellishments :) )


Be sure to use your wood veneer embellishments on your next layout...or you can send them to me...ha ha ha :)

Melanie

Wednesday, February 20, 2013

Crop Coming Soon - So Get Your Mojo Here!

One of the most exciting times here at The ScrapRoom is rolling around again... yes, that's right:  we've got a crop on the schedule for this weekend!  If you are on the Message Board (and if you aren't... what are you waiting for???) you've seen us chatting about it - and some of us are looking forward to this crop for one big reason:  our mojo... isn't quite what it should be.  And crops are almost magical in their ability to spark the mojo.

So what's this mojo that we speak of?  Well, I found this definition at wiki.answers:
Mojo means "finding the magic in what we do."  To have "lost your mojo" refers to a loss of inspiration or creative genius; a loss of that special spark. 
Fortunately for us, not *everyone* has lost their mojo.  In fact, if you browse through the member's gallery, you'll notice that there's actually quite a few gals with smokin' hot mojo - and the willingness to share it with us!  So here are a few of their projects, and what they have to say about making mojo happen:

"All Mine" by Mandyjane:  "I use to spend ages in my craftroom staring at my kits trying to decide where to start, now I give myself one hour and if I haven't got much done by then I pack up and do something else. No wasted time just shuffling papers."  Mandyjane also hits up favorite websites for challenges.
"Together" altered canvas by scrappy_granny:  "I find it harder to move forward and really get into the new stuff."  So scrappy_granny finds scraps of old stuff, and, well, wrecks it.  Paint, layers, ink - her mojo-maker is wrecking paper!
"December 2012" by TerryB:  "When my mojo is missing, I work on my PL pages.  It's a format, so it's easy to get started.  Then I can add some creative touches, and it will usually give my mojo a kick start."
"Snap the Photo" by jojojorenee:  "I try to keep my mojo going by frequently visiting the scraproom gallery and ideas link so that my ideas for the kit stay fresh."  And which kit to choose?  "I also try to chose a line that I have not cut into from the kit(s) and get to work on it as soon as I am in my scraproom."
"Dream Big" by rgeile:  "I have to allow myself to play and be creative, and I have to keep it simple. It's okay to walk away from other responsibilities sometimes.  Because I am a better wife/mom/student when I do that. Win-win."  In fact, rgeile has a formula she uses to keep it simple:  "This is my go-to method when I am "out of mojo".  I take a stack of photos, put them in a grid, and embellish with a couple straight strips of paper.  That's it.  No challenges.  No complicated techniques.  No froof.  Just get it done."  And I particularly love this little bit of advice:  "Wear shoes around house so that icky floors are easier to ignore."  Yep.  Win-win for sure!
Project Life pages by Gilly:  "I get my mojo from what is going on around me. TSR, other scrappy sites, and pinterest give me great inpirations.  Playing with pictures, paper, going to the LSS, or looking at a magazine...and of course sitting down with a bold cup of java, gets me motivated!  Right now I am getting my mojo from getting a lot scrapped in a simple style with pocket pages."
"This is Totally Sam" by Theresa Sovacool (yeah, I'm a TSR member too!):  "Nothing gets my mojo going like a deadline.  So I love crops, challenges, setting goals... and setting a timer!  This layout is part of my goal to get all the kid art from 2009 scrapped... only 2 more pages left!"
So are you ready to get YOUR mojo going?  Then become a member on the Message Board and come play this weekend!  We'll have games, challenges, prizes, and tons of chit-chat.  It's all member run, so if you want to throw down a challenge... well, then... bring it!  LOL

And here's the official word on the crop:  "We'll keep it casual, no timeline. Post your challenges sometime on Friday. We'll keep all the challenges open for just over a week, and close them on Sunday, March 3rd at midnight. Gals can pick their winners on Monday."  

Sounds awesome!  See you at the crop!

- Theresa/Savi

P.S.  Big love to the gals who pitched in on this post - your generosity is much appreciated!

Monday, February 18, 2013

BasicGrey Clubs at The ScrapRoom! (Last chance to sign up!)

We have been offering our popular BasicGrey Page-of-the-Month Club at The ScrapRoom for three years, and we're bringing it back for 2013!

We only have (5) spots available in the Page-of-the-Month Club still available. Email me today to guarantee you don't miss your chance to work with these great kits all year long! Registration for our BasicGrey Clubs close as soon as all available spots are filled.

As a BasicGrey PAGE-of-the-Month member, each month you will receive a monthly class layout kit, filled with beautiful BasicGrey products and award-winning inspiration. Each class layout has been designed by one of BasicGrey's talented designers and will give you the products and the design techniques to take your scrapbook pages to the next level.


  • Patterned papers from BasicGrey's most current collections
  • Full packs of coordinating and innovative embellishments
  • A full detailed set of 2-page layout instructions and a coordinating sketch, including fun techniques for your layouts, like accordions, pinwheels and rolled spiral flowers
  • A full detailed set of instructions and coordinating sketches, including fun techniques for your cards, like accordions, pinwheels and rolled spiral florals
  • Exclusive papers, only available to Page-of-the-Month customers, will be included throughout the year
  • Exclusive bonus projects to use up your leftovers
  • Exclusive digital content available each month, which can be downloaded and used with the bonus projects
  • FREE additional Holiday Kit, shipped with your final kit
  • Cost per month is $19.99 (plus shipping)
  • **If you are a member of any other ScrapRoom Clubs, you will only be charged one shipping charge for your combined shipment.
  • Visit our website today to JOIN THIS CLUB!
  • In addition, we're adding the Basic-Grey Card-of-the-Month Club to our offerings this year! 

    We only have (6) spots available in the Card-of-the-Month Club still available. Email me today to guarantee you don't miss your chance to work with these great kits all year long! Registration for our BasicGrey Clubs close as soon as all available spots are filled.

    As a BasicGrey CARD-of-the-Month member, each month you will receive a monthly class card kit, filled with beautiful BasicGrey products and award-winning inspiration. Each class has been designed by one of BasicGrey's talented designers and will give you the products and the design techniques to take your cards to the next level.
  • (1) 6x6 Paper Pad
  • (1) Sticker Sheet (Alphabet, Element or Title Stickers)
  • (2) Embellishment Packs
  • Card Bases & Coordinating Envelopes
  • A full detailed set of instructions and coordinating sketches, including fun techniques for your cards, like accordions, pinwheels and rolled spiral florals
  • Exclusive digital elements, which will coordinate with the collections
  • Plenty of paper left over to create additional cards and projects
  • FREE Exclusive Designer Card Organizer shipped with your final kit
  • Cost per month is $16.99 (plus shipping)
  • **If you are a member of any other ScrapRoom Clubs, you will only be charged one shipping charge for your combined shipment.
  • Visit our website today to JOIN THIS CLUB!
  • Friday, February 15, 2013

    Project Life: Weeks 7 & 8

    For my 2012 Project Life album, Week 7 corresponds to Valentine's Day.  I chose the American Crafts XO kit since there was a lot of black and red in my photos.  It turned out to work very well.  (Click on photos to enlarge.)

    Week 7


    Since the paper in this kit is SO cute, I decided to keep my title, journaling, and filler cards simple.  For this one, I used a strip of 2.5" x 6" embossed cardstock.  The word February was cut with my Silhouette from black cardstock, but you could just as easily use some stickers from your stash.  The heart was punched from the back of one of the papers.  I stamped the date on a small scrap of red and then notched the ends.


    Another simple insert.  I cut a piece of 2" x 4" paper and layered it with a border punched strip on top of the back side of one of the papers.  Add a couple of the super cute layered stickers and some typed journaling and done.


    Ok, this one is my favorite!!!  I had a bunch of my kids' Valentines from their classmates to include.  Originally, I was going to place them all in the pockets but they were all different sizes and orientations.  My fix?  To create a pocket.  I cut a 2" x 4" piece and layered it over a 4" x 6" piece.  I used Red Line tape on the bottom and sides to keep it in place.  Then, I added a couple of embellishments.  The whole pocket along with Valentine cards easily fits into the page protector.  My kids were SUPER excited.


    For this next insert, I used the Midway Washi Tape from the Embellishment Add-On to tape down the card that came with my flowers from my husband for Valentine's Day.  So excited that I saved that!  The only other embellishment that I used are the Studio Calico wooden people from several kits ago.  Their size is just perfect for Project Life!


    This month's Stamp Set is too cute!!!  And just perfect for my Valentine spread.  I decided to stamp the images in White Staz On ink directly onto my photos.  I was really nervous, but it turned out to be easy.


    Here's the last two filler cards.  Nothing but patterned paper and a cute heart sticker.


    For Project Life: Week Eight I chose the Pebbles Family Ties line.  The bright colors and floral patterns were just perfect for my outdoor photos.  (Click on pictures to enlarge.)

    Week Eight


    My title block is pretty simple this week.  I added some Thickers from my stash and a circle label sticker that came with the kit.  It just thrills me to get to use up some of my Thickers stash!


    For one of my 3x4 slots, I printed out a screen shot of one of my husband's super sweet texts.  Such a great memory and so easy to include.  


    The Pebbles Chips are so cute without being too bulky.  I added several of them to the 3x4 filler cards.  For the My Brother Is card, I used the OA mini alphabet stickers to list some characteristics of the boys.  The yellow and white polka dot card was a freebie that I found at Pinterest.  You can find tons of fun downloads for Project Life pinned there.  If you'd like to print one out, you can find it HERE.


    For this week's journaling, I created a Week In Review card.  Rather than journal about each specific event, I just summarized the entire week on the 4x6 Pebbles card that came in the kit.  This made the layout even quicker to put together.


    I'll be back soon with some more PL posts.  There are tips, tricks, tutorials, and more freebies.  If there's anything you'd like to see in upcoming Project Life posts, leave me a comment.  I'd love to hear from ya!

    - Aphra

    Wednesday, February 13, 2013

    Confession Time with Theresa

    Alright.  Get ready.  *deep breath*

    Some paper out there?  Yeah.  It, um, scares me.

    And I've thought about it a lot, trying to understand why that is, and I've come to a rather startling conclusion.  The paper that is scary to me?  Yeah.  Well.  See... I'm pretty sure it's all in my head.  I think I'm doing it to myself.

    Whoa, right?  And I think I'm not the only one out there.  In fact, we've been chatting about it on the Message Board, and everyone seems to have their own hang-up.  Florals... stripes... vintage... large graphics.  I guarantee you that you can show me a piece of paper - or even a line of paper - and I'll find someone who loves it AND someone who hates it. 

    So I think it is inevitable.  At some point, Tammy will offer a kit with a piece of paper, or even multiple pieces of paper, that scare the gee-whiz out of you.  So, I'm here to offer solutions, or at the very least, some coping mechanisms.

    Solution 1:  Chocolate
    This is one of my favorites, and it seems to work for just about any problem, to be honest.  The great thing is that you don't even have to look at your scary paper to do this step (although I recommend that you have it out so you can give it the hairy eyeball and think while you enjoy your treat).

    Solution 2:  Snoop
    For every piece of paper or paper line out there... there is a group of brave women who conquered it.  Most of them probably actually loved working with it, too.  Remember, your nemesis is someone's all-time-favorite (crazy, I know).  So... Google it.  Type in the manufacturer, paper line, and even name of the paper itself.  Try to find the reveal blog post if you can.  And then (*ahem*) come back here and look at what we did for you in the Gallery.  Heck, every kit even has a recipe card so you can just read, cut, and assemble and not fret at all about that scary paper.

    Solution 3:  Turn it over
    Yeah, let that B-side help you out.  If the main side is giving you fits, nobody said you have to use it.  Turn it over and move on already!
     
    Solution 4:  Wreck it... creatively
    Crinkle it, ink it, paint on it, fold it, sew it, throw glitter on it, CHANGE IT UP.  This helps with those large graphics, too.  Cut a strip through a graphic, pleat it, distress it... no one knows you started with a bicycle or a bunch of flowers.  Here are a few examples... and I won't admit that I used paint and stuff because the paper scared me.  Because what if you really loved that paper and are now offended that I didn't?  *wink*  But I will say up front... these two layouts?  I ended up loving them.
    "Summer Soul" using Fancy Pants Summer Soul
    "The Wine Expert?" using Crate Paper On Trend
    Solution 5:  Cut it into really small pieces
    Now I'm really nervous to tell you about this one.  I do this quite a bit - both to regular print paper and to papers with large graphics or border/card prints.  Apparently I am frightened by many, many papers out there.  And I am a grown woman!  Paper should not scare me!  And I will not admit that when I am cutting up scary paper into little pieces... I'm sort of maniacally laughing.  Nope, not going to fess up about that!  LOL
    "You Me & GPS" using Bella Blvd Kiss Me
    "Happy Up North" using Crate Paper On Trend
    Solution 6:  Isolate colors
    I hesitated to call this a solution on its own, but I caught myself doing this with a kit earlier today.  I just couldn't deal with a particular paper, so I had been avoiding all the others with it.  (It was being mean!  And scary!)  So to start, I just pulled out all the green paper - turns out there were a few sheets of tone-on-tone patterns.  Then I started building a layout.  No, I never used that original scary paper, but I ended up dipping into some others I wasn't planning on.  Here's an example... with some clever cutting, I was able to isolate blues and browns from all the other colors.  Then it became easy to work with (and I see some pink snuck its way back in)!
    "Team Sovacool" using Bella Blvd Kiss Me
    Now, I won't claim to have invented any of these ideas.  I do claim to have used most - heck, let's just say ALL - of these.  But I'm sure these aren't the only solutions out there.  What have I missed?  Leave a comment below and help us in the fight against scary paper! 

    - Theresa/Savi

    Monday, February 11, 2013

    White Pen Magic with Jenny

    Hello everyone!

    One of my most favorite things to do on a layout is to create a little detail work with a pen!  A good, white gel pen makes all the difference in the world.  You can doodle dots with the white pen like I did on this layout:

    Or, outline title letters like I did here:

    Or, simply add a white outline around patterned papers like I did with this month's Pebbles "Family Ties" collection:

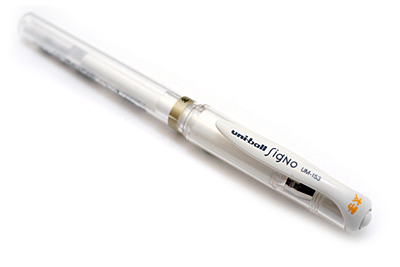
    I get asked all the time what white gel pen I use on my pages.  In fact, Tammy emailed me not too long ago to ask the same question.  And now, she offers this pen in the TSR Store!!  My secret weapon?
    The Uni-Ball Signo Broad White Gel Pen.  I have tried a lot of white pens in the past, but this one is hands-down the best!  It's great for journaling, too.  The ink goes on smoothly and boldly.  And, at only $3.49, it's a steal!  It's totally worth the money, and it lasts for quite a while.  Once you try this pen, you'll be hooked. ;)

    Be sure and check out the TSR Store to purchase this pen and other must-have scrapbooking staples.  Tammy does such a great job at listening to what her customers recommend and need, and she offers such a great selection!  I know you'll love using this pen as much as I do. :)

    - Jenny

    Friday, February 8, 2013

    We *heart* Hearts!

    V-day... it's coming... and whether you choose to make it a big deal or just keep it on the down-low, a little Valentine's Day card or project is never out of place.  While you'll probably have your kits before the 14th, you can take any of these ideas and combine them with any paper you have with fantastic results.  All you need to do is add a little heart to it.  *giggle*

    Melanie used a tag, a doily, and some twine... Perfect.  Even if you don't have this exact print, you can get the same look with other large graphics or diecuts + an added heart...
    ... like what Beth did here.  A horse + a heart = awwwwwwww! 
    A card can be a great way to use up those leftover embellishments, too.  I used this large photo frame (with hearts!) as a base for some extra bits.  Your sweetie doesn't have to know they got the leftovers.  *wink*
    Beth used some kraft hearts around a fussy-cut heart on this layout - and I bet you could make a card or a little love note just like this, too.
    Not into any of that mushy love stuff?  No one said a card for your sweetie had to be all pink and girly.  Jenny adds a little red heart to this card... just another way to say "P.S.  I love you."
    Try not to stare at the chocolate... and look at the cutest little card that Melanie made.  Quick and simple, but wonderful as a treat bag topper or tucked as-is into a lunchbox or briefcase.
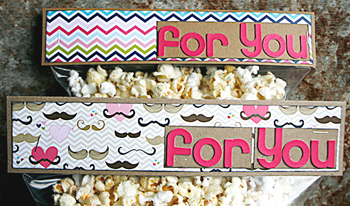
    And speaking of treat bag toppers... Tammy made these cuties with strips of fun paper and a set of bright alphas.  Easy peasy!
    Jenny used this fun printed tag, too - and I love the different look she gets just by tilting it a little. And again, if you don't have this particular print, don't worry.  Make a tag shape and add...
    ... hearts and ink like Beth did, or...
    ... punched shapes and banners like I did - and then sew them down for extra texture! 
    Next time you need some inspiration, head over to our Gallery.  Whether you look at our layouts, cards, or projects, you'll always find something to spark your mojo.  Need to make a page or just fill a little corner?  We've got you covered.  Just take what inspires you and add a little heart.  *love*

    - Theresa/Savi